First, download the QuickSora theme package from your purchase source. After downloading, locate the ZIP file named quickstora.zip inside the main package — this is the file you will upload to WordPress.
Log in to your WordPress admin dashboard using your username and password.
(Example: yourwebsite.com/wp-admin)
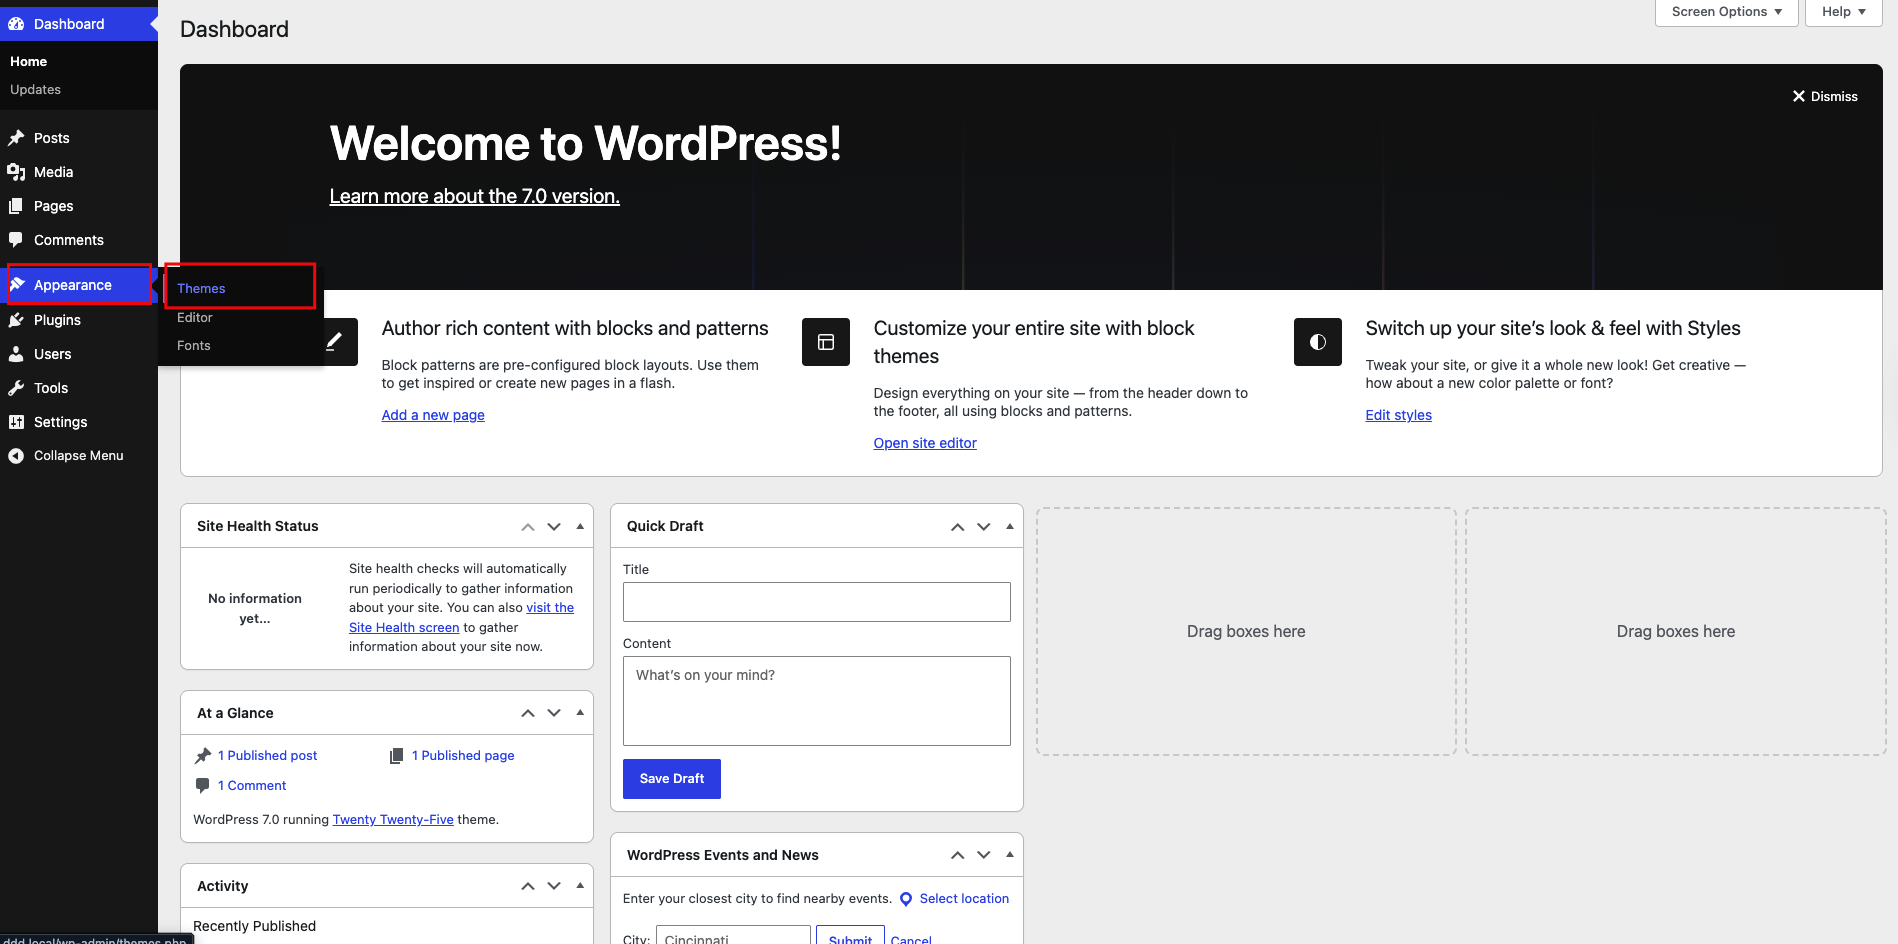
From the left sidebar, navigate to:
Appearance → Themes
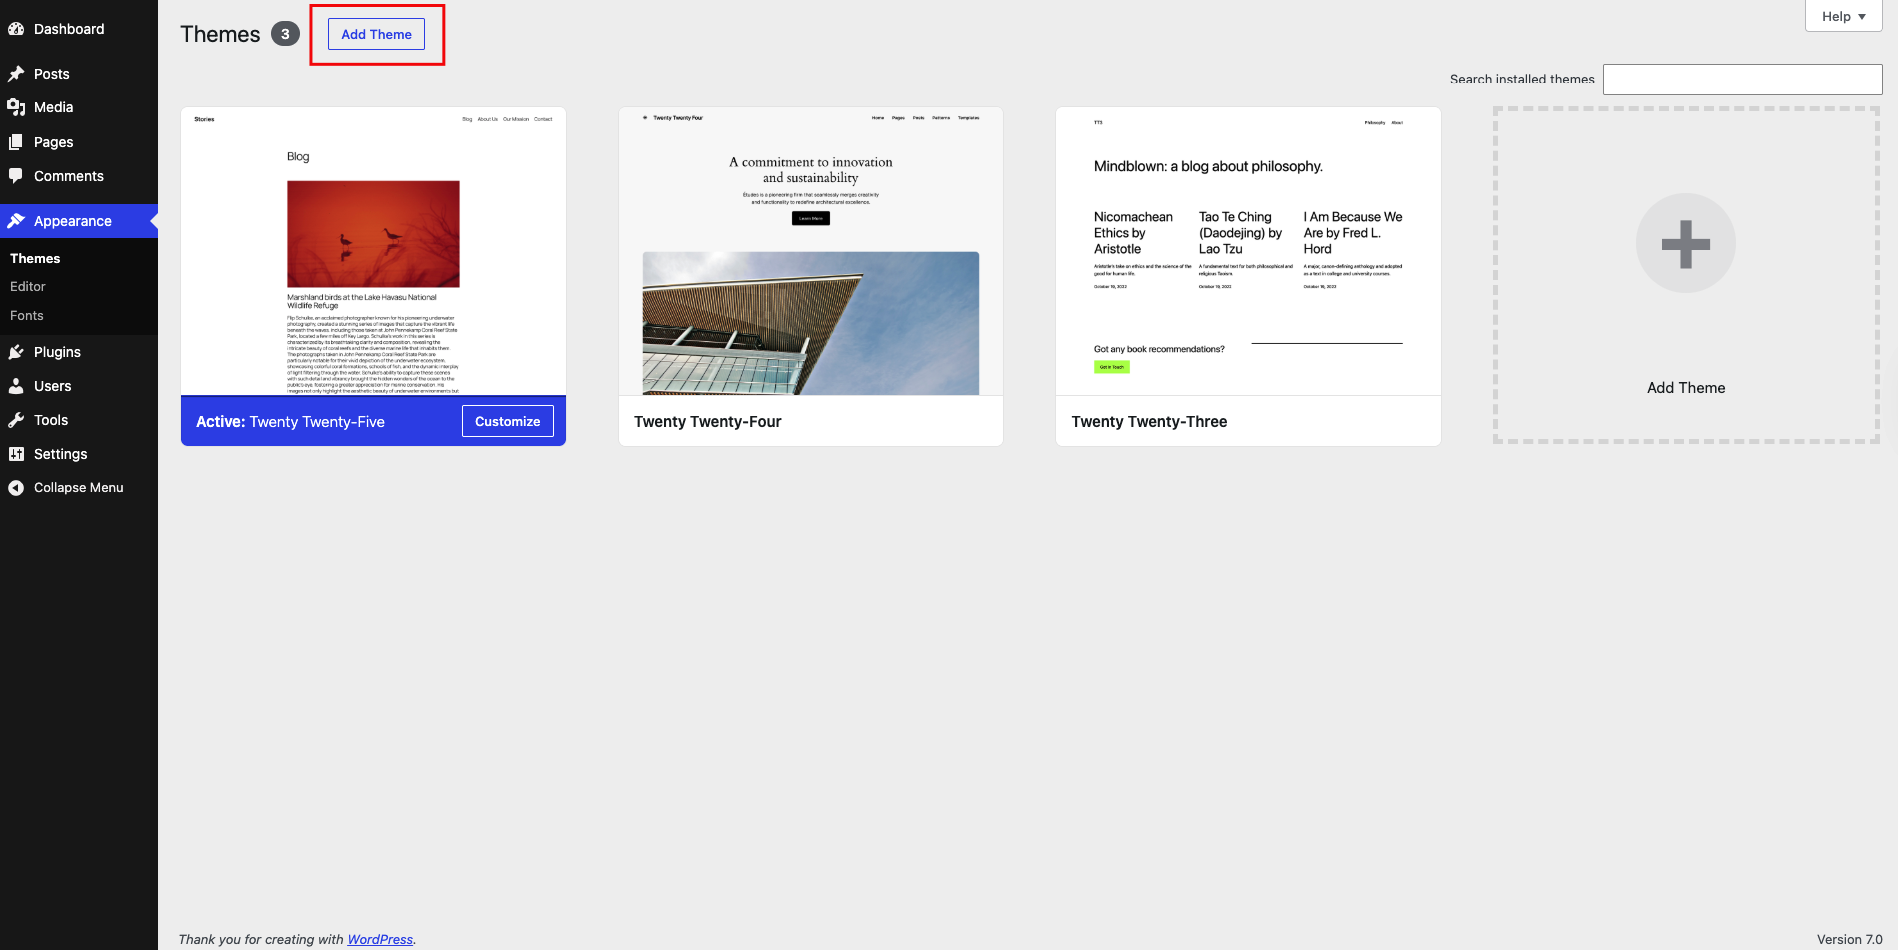
Click “Add New”
On the Themes page, click the “Add New” button at the top.
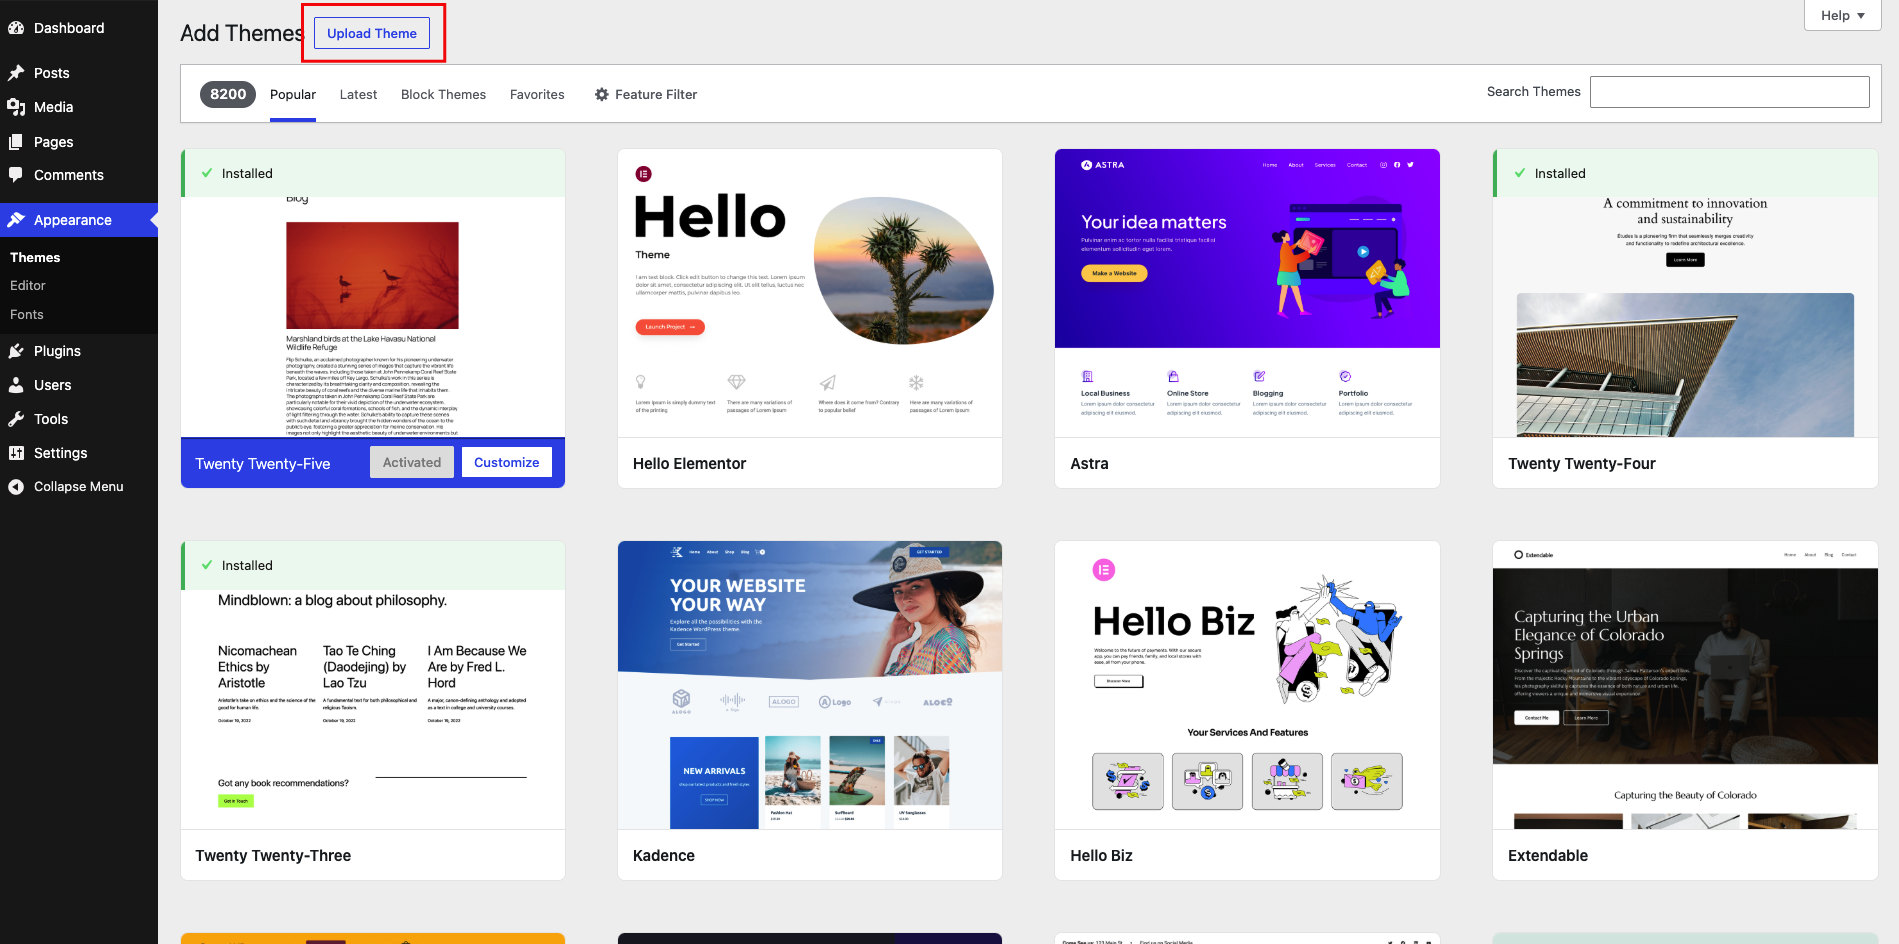
Now click the “Upload Theme” button.
Click “Choose File” and select:
quickstora.zip
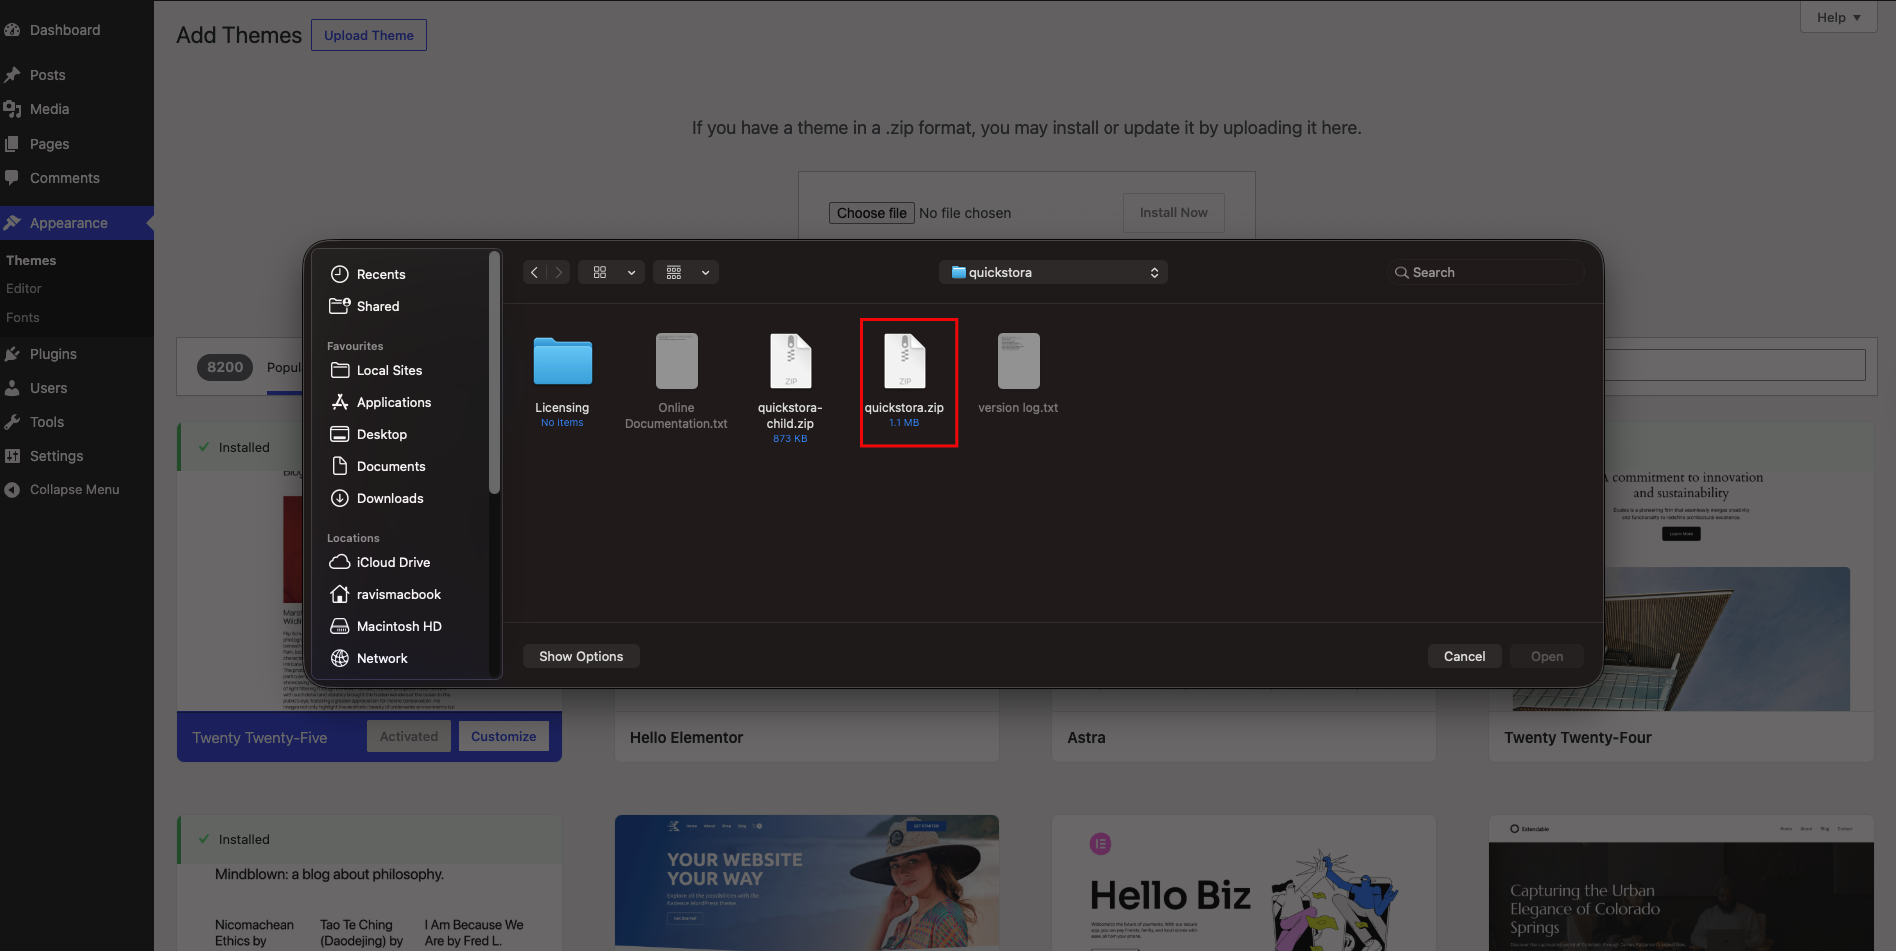
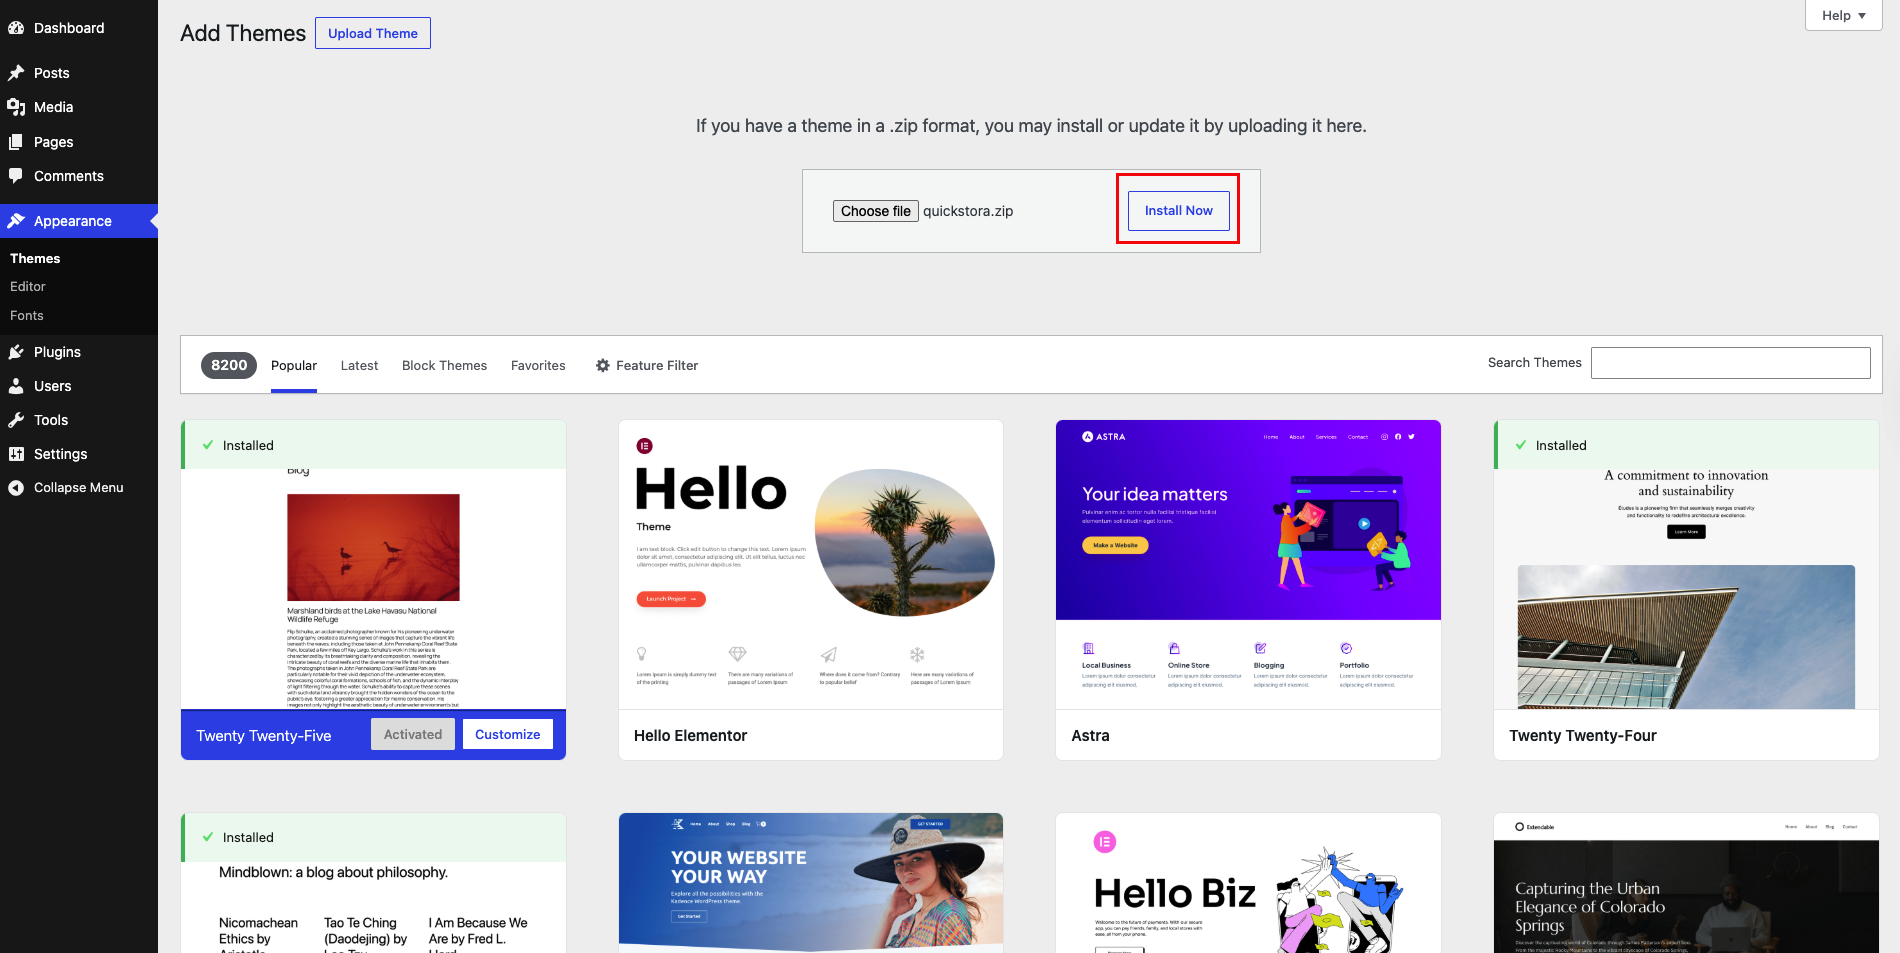
Click the “Install Now” button and wait for the installation to complete.
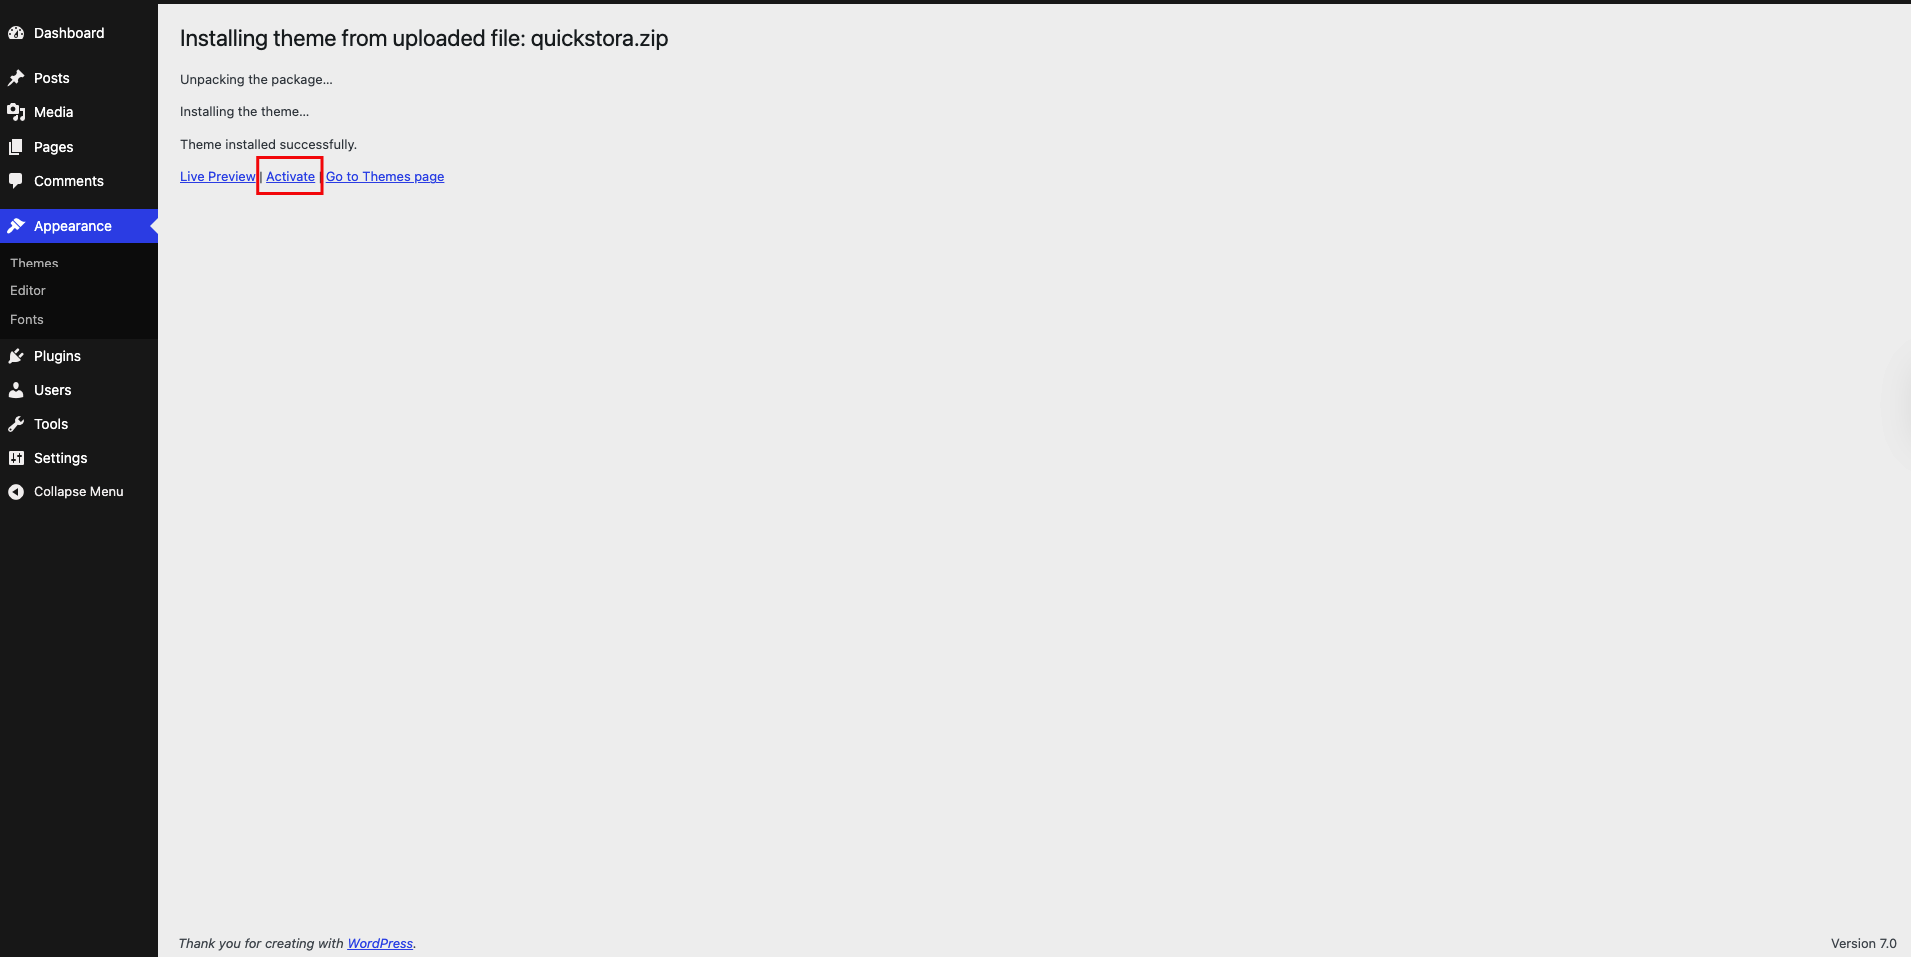
After installation, click “Activate” to apply the theme to your website.
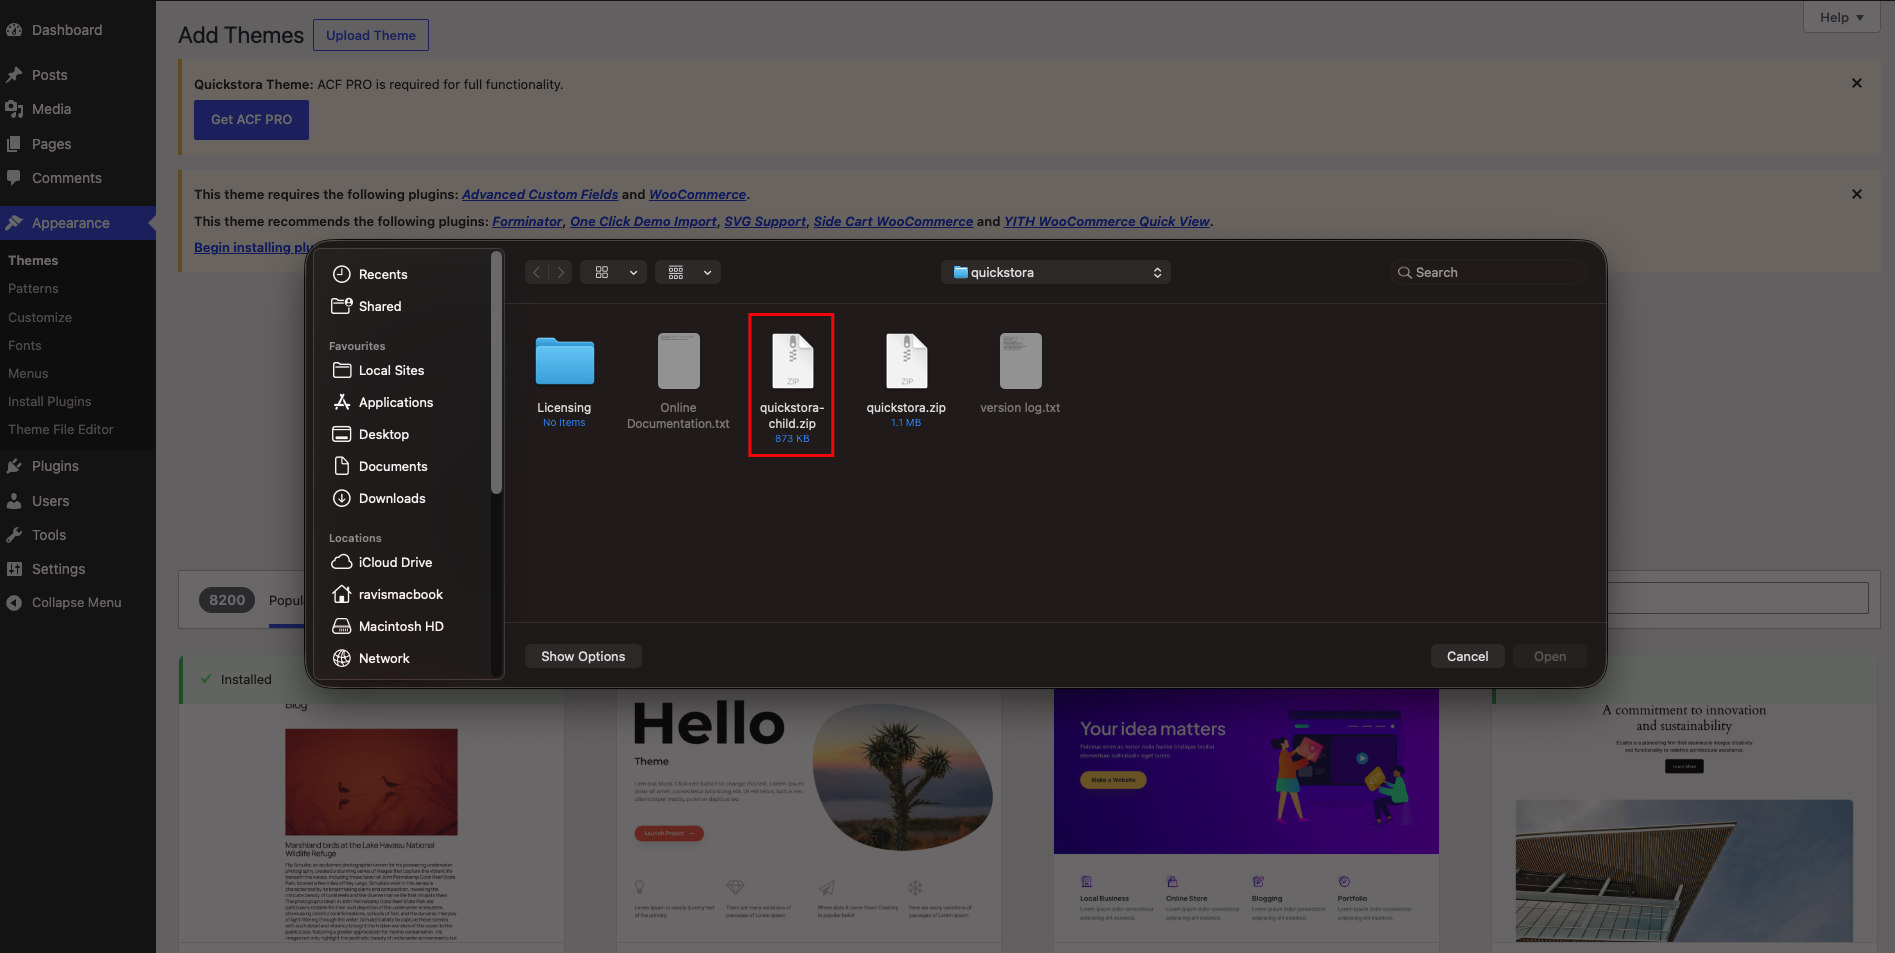
Install Child Theme
Repeat the same process to upload:
quickstora-child.zip
Then click Activate on the child theme.(A child theme is recommended because it keeps your custom changes safe during theme updates. If you modify the main theme directly, your changes may be lost after updating the theme.)
After theme activation, look for a notice at the top:
This theme recommends the following plugins
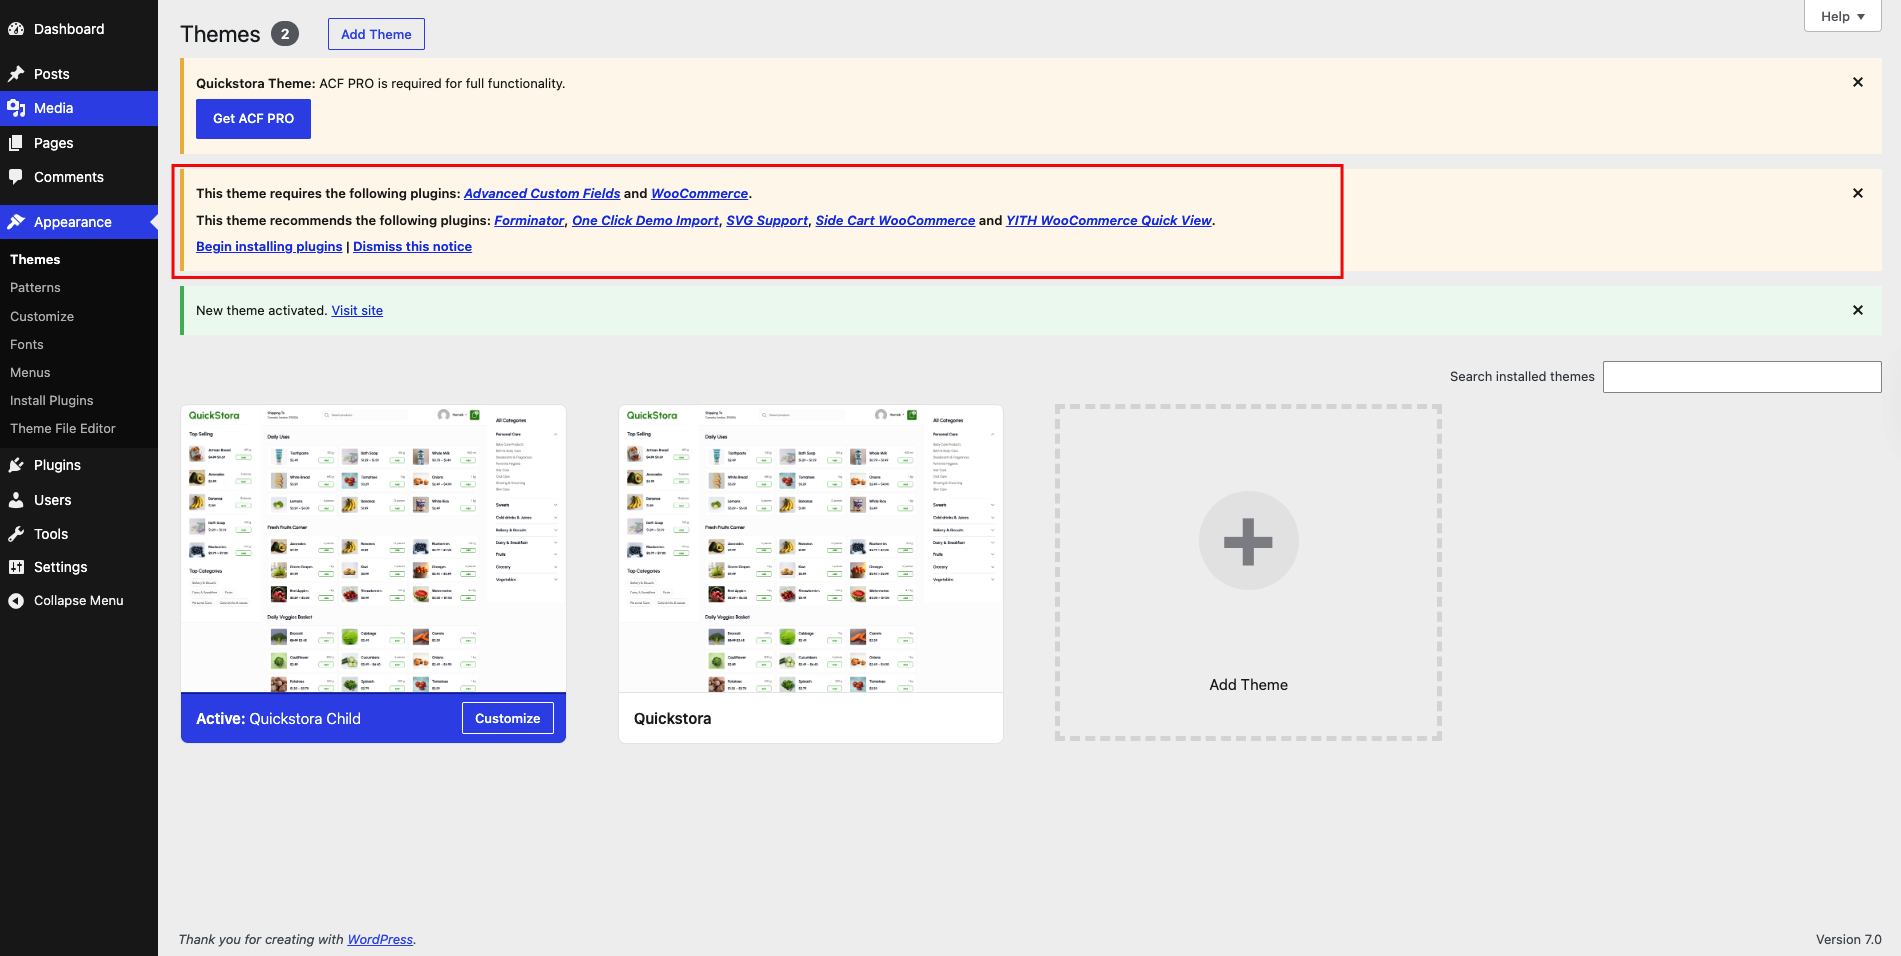
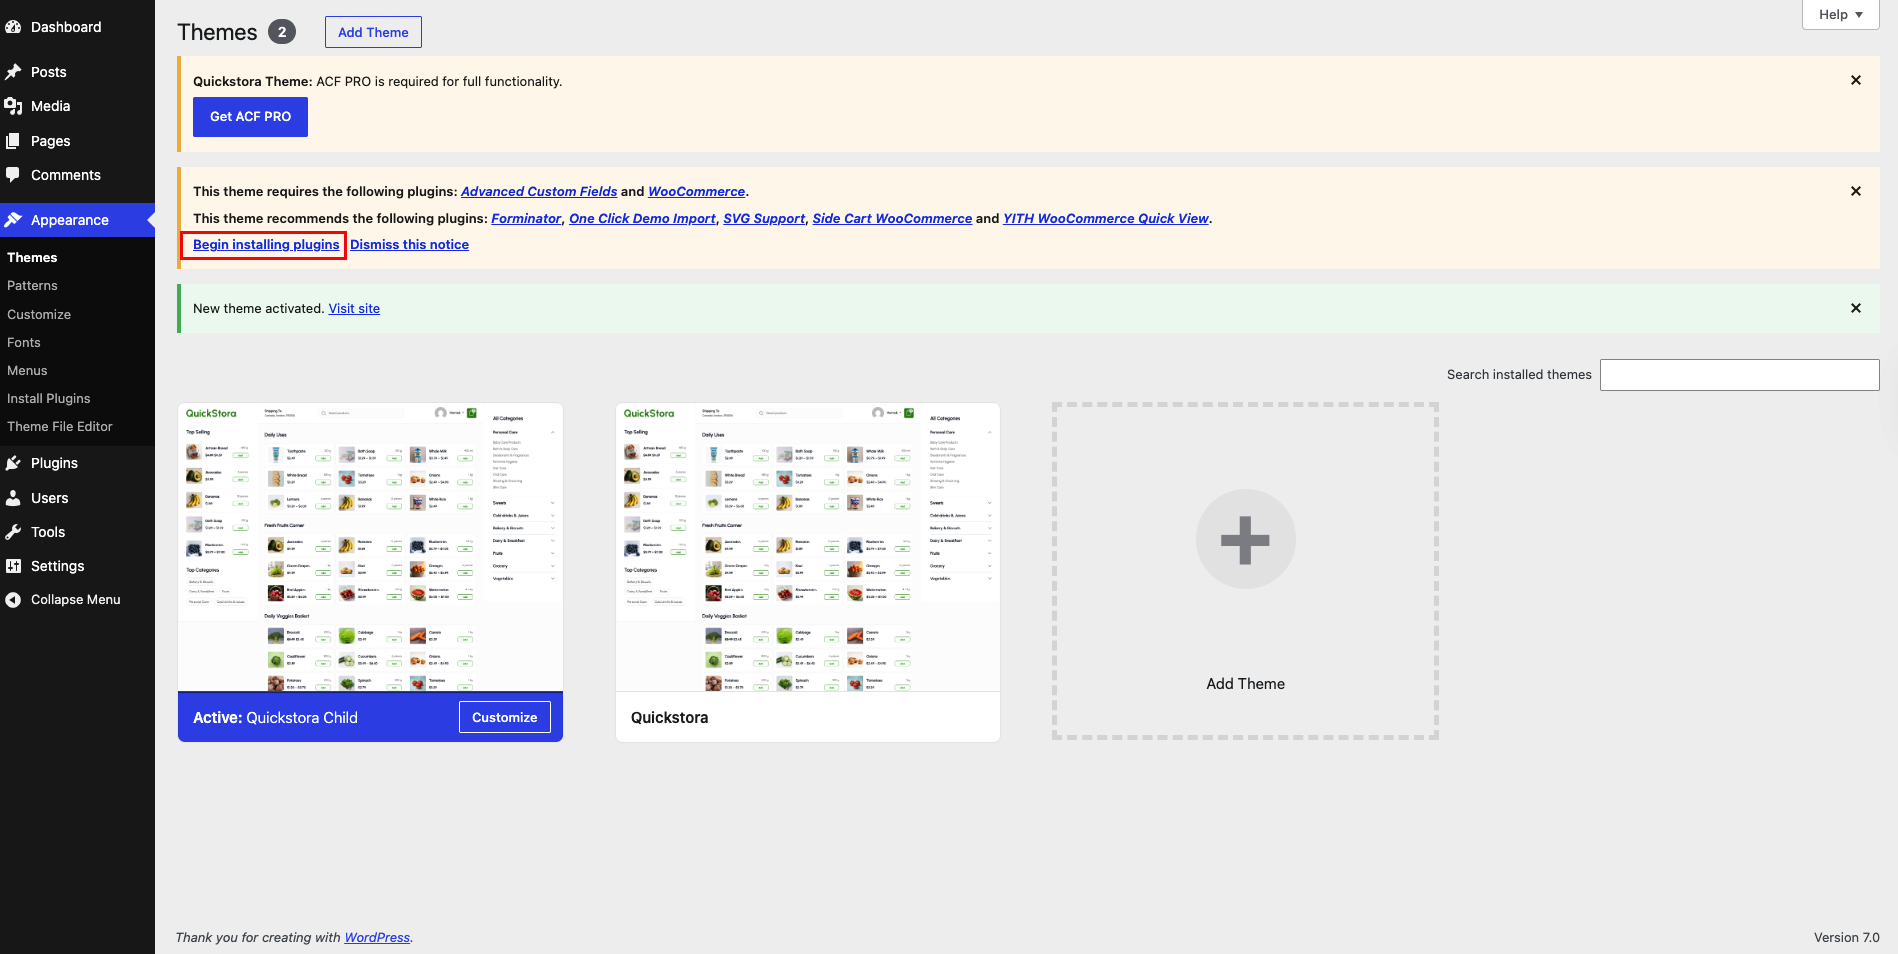
Click on:
Begin installing plugins
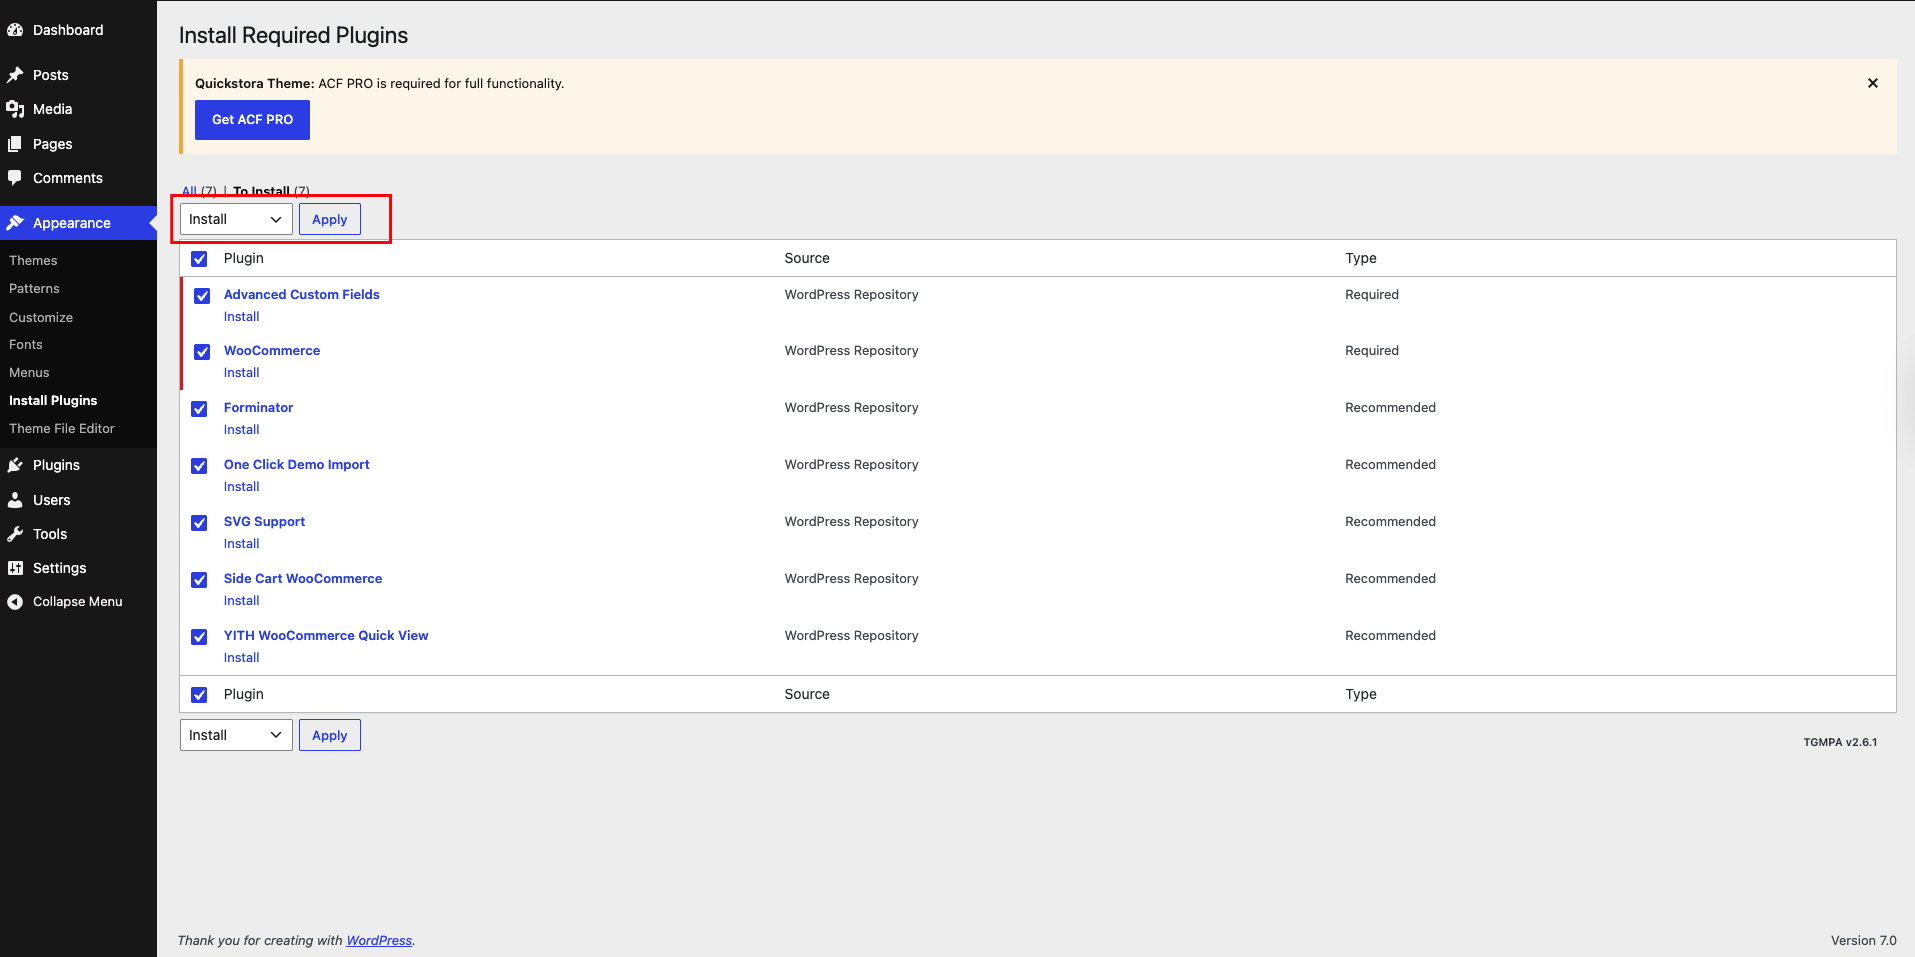
Select all plugins from the list.
From the bulk actions dropdown, choose:
Install
Click Apply
You see a notice in your dashboard:
“Quickstora Theme: ACF PRO is required for full functionality. Get ACF Pro”
This means the theme uses ACF PRO (Advanced Custom Fields Pro) to manage custom sections and content.
⚠️ Important Note
Without ACF PRO:
Some sections may not work ❌
Custom fields will not load ❌
Demo import may break ❌
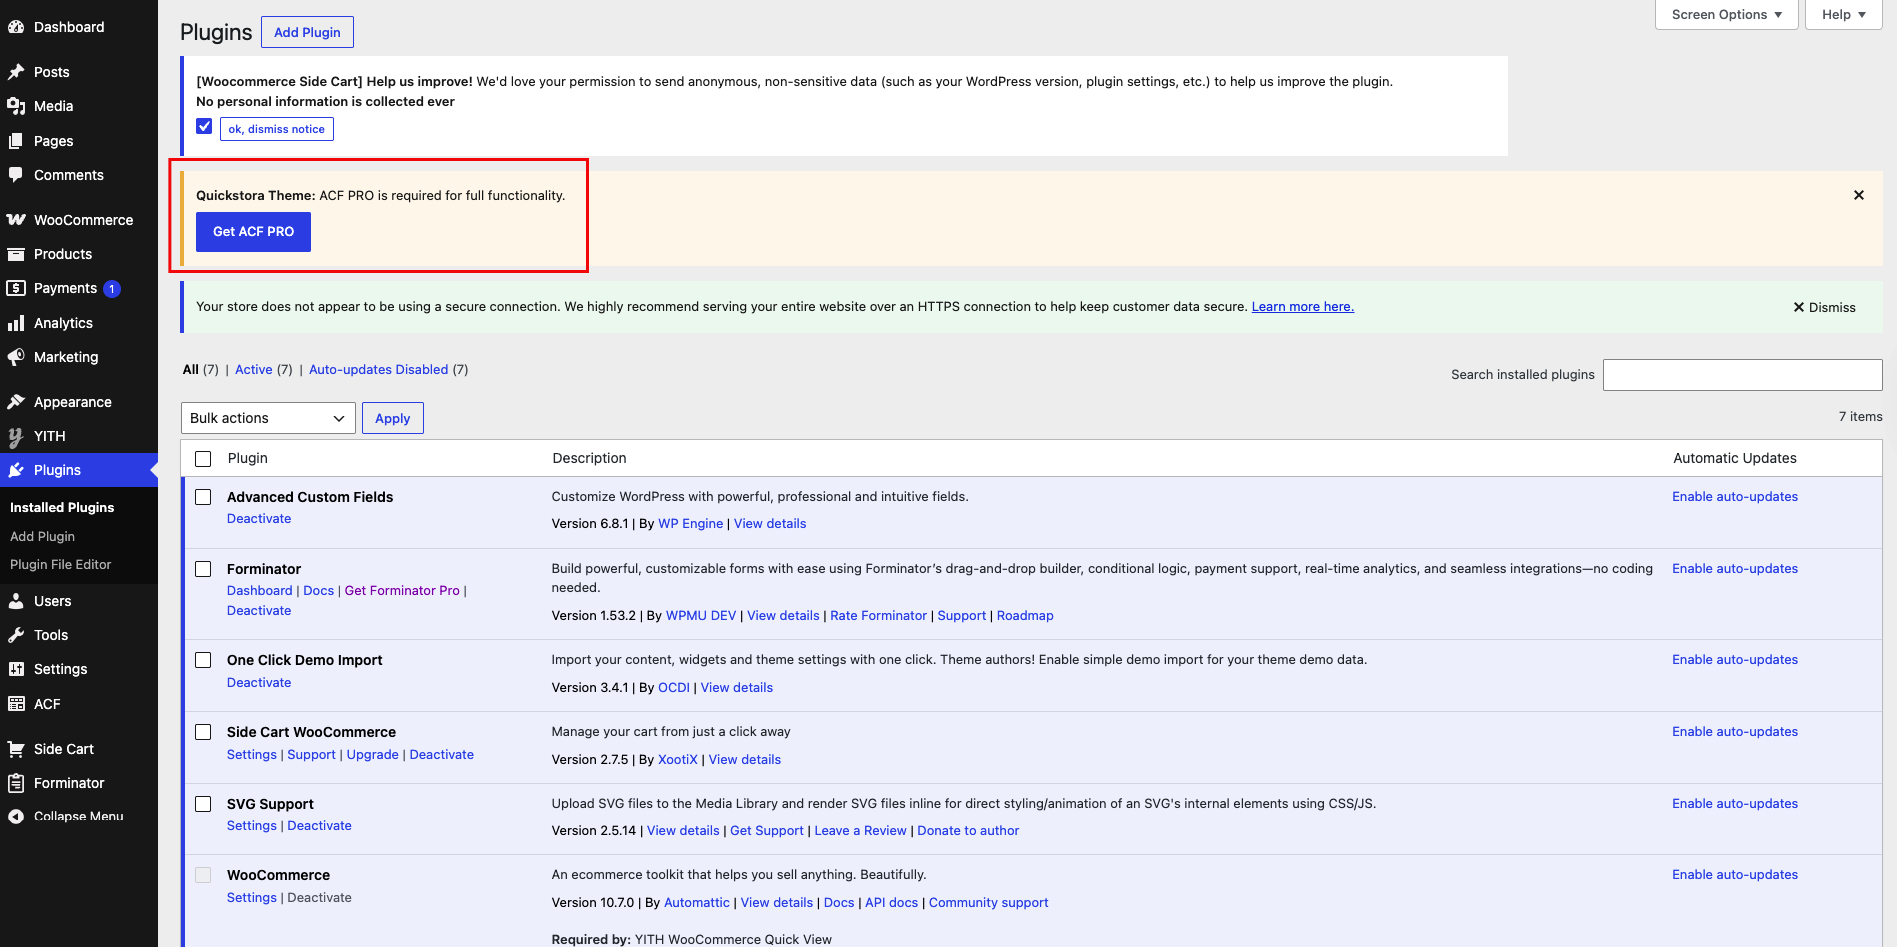
Click on the “Get ACF PRO” link from the notice in your WordPress dashboard.
You will be redirected to the official website.
Choose a suitable plan and complete the purchase.
After purchasing, download the plugin file (acf-pro.zip).
Go back to your WordPress dashboard and navigate to:
Plugins → Add New → Upload Plugin
Click “Choose File” and select the downloaded acf-pro.zip file.
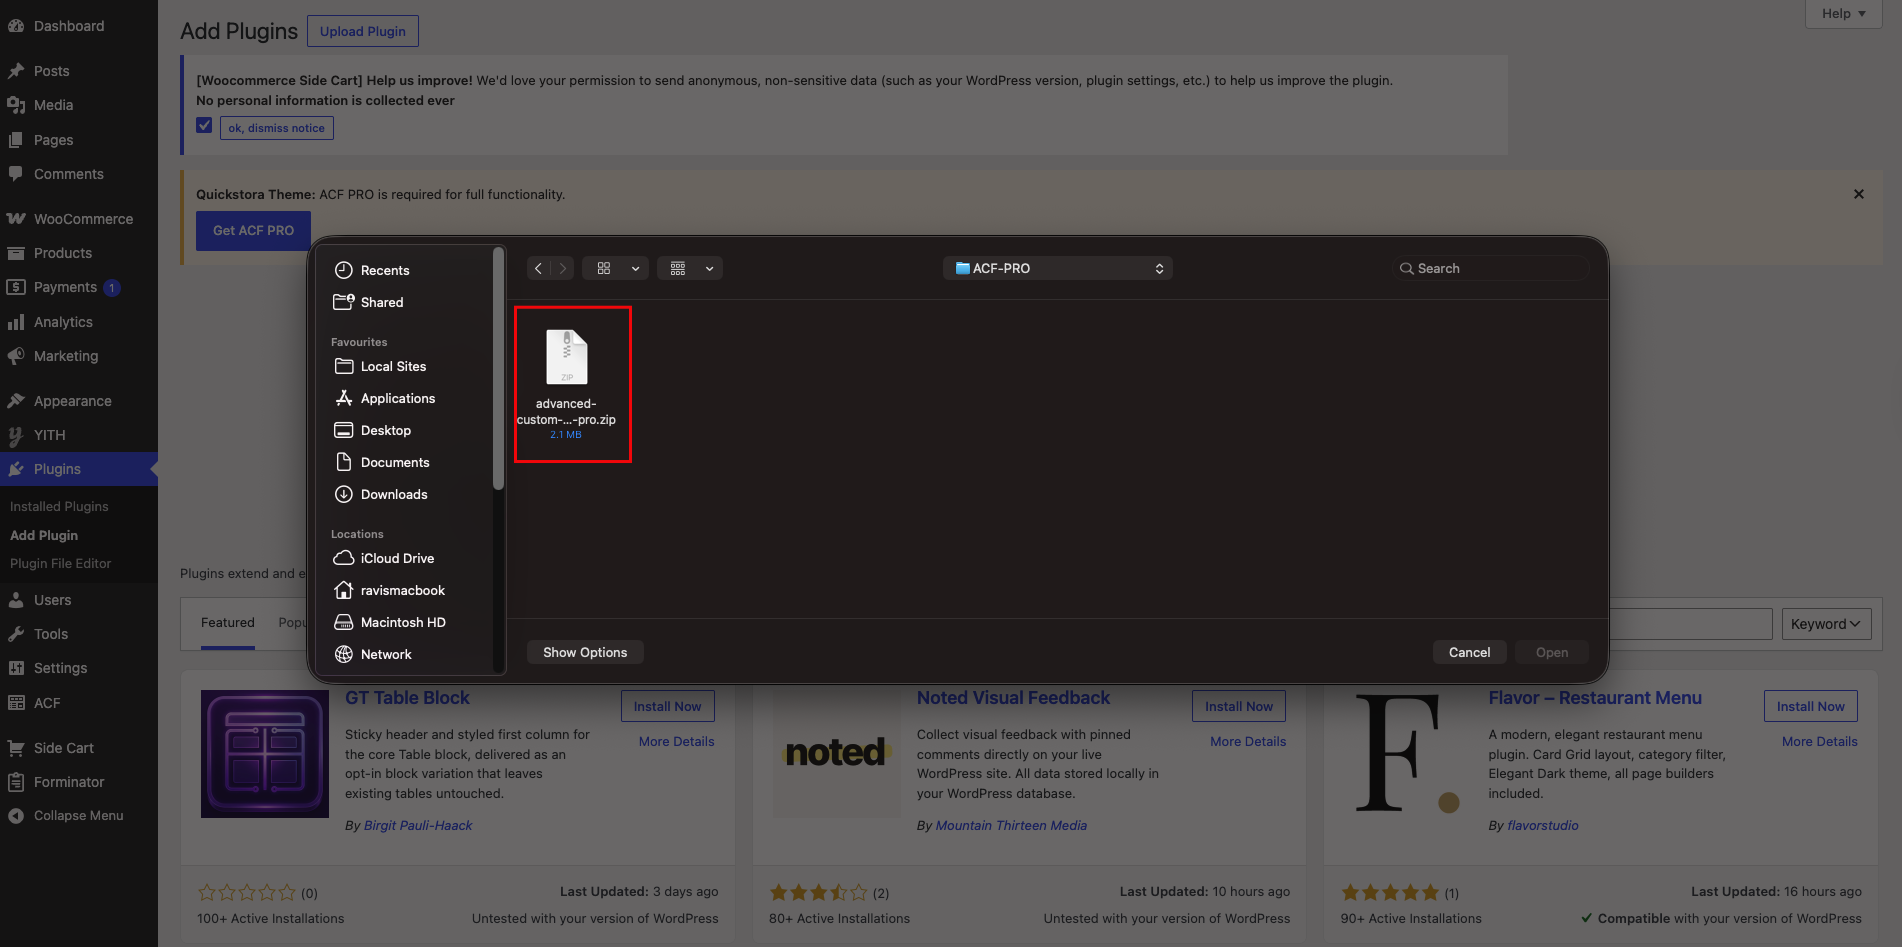
Click “Install Now”, then click “Activate”.
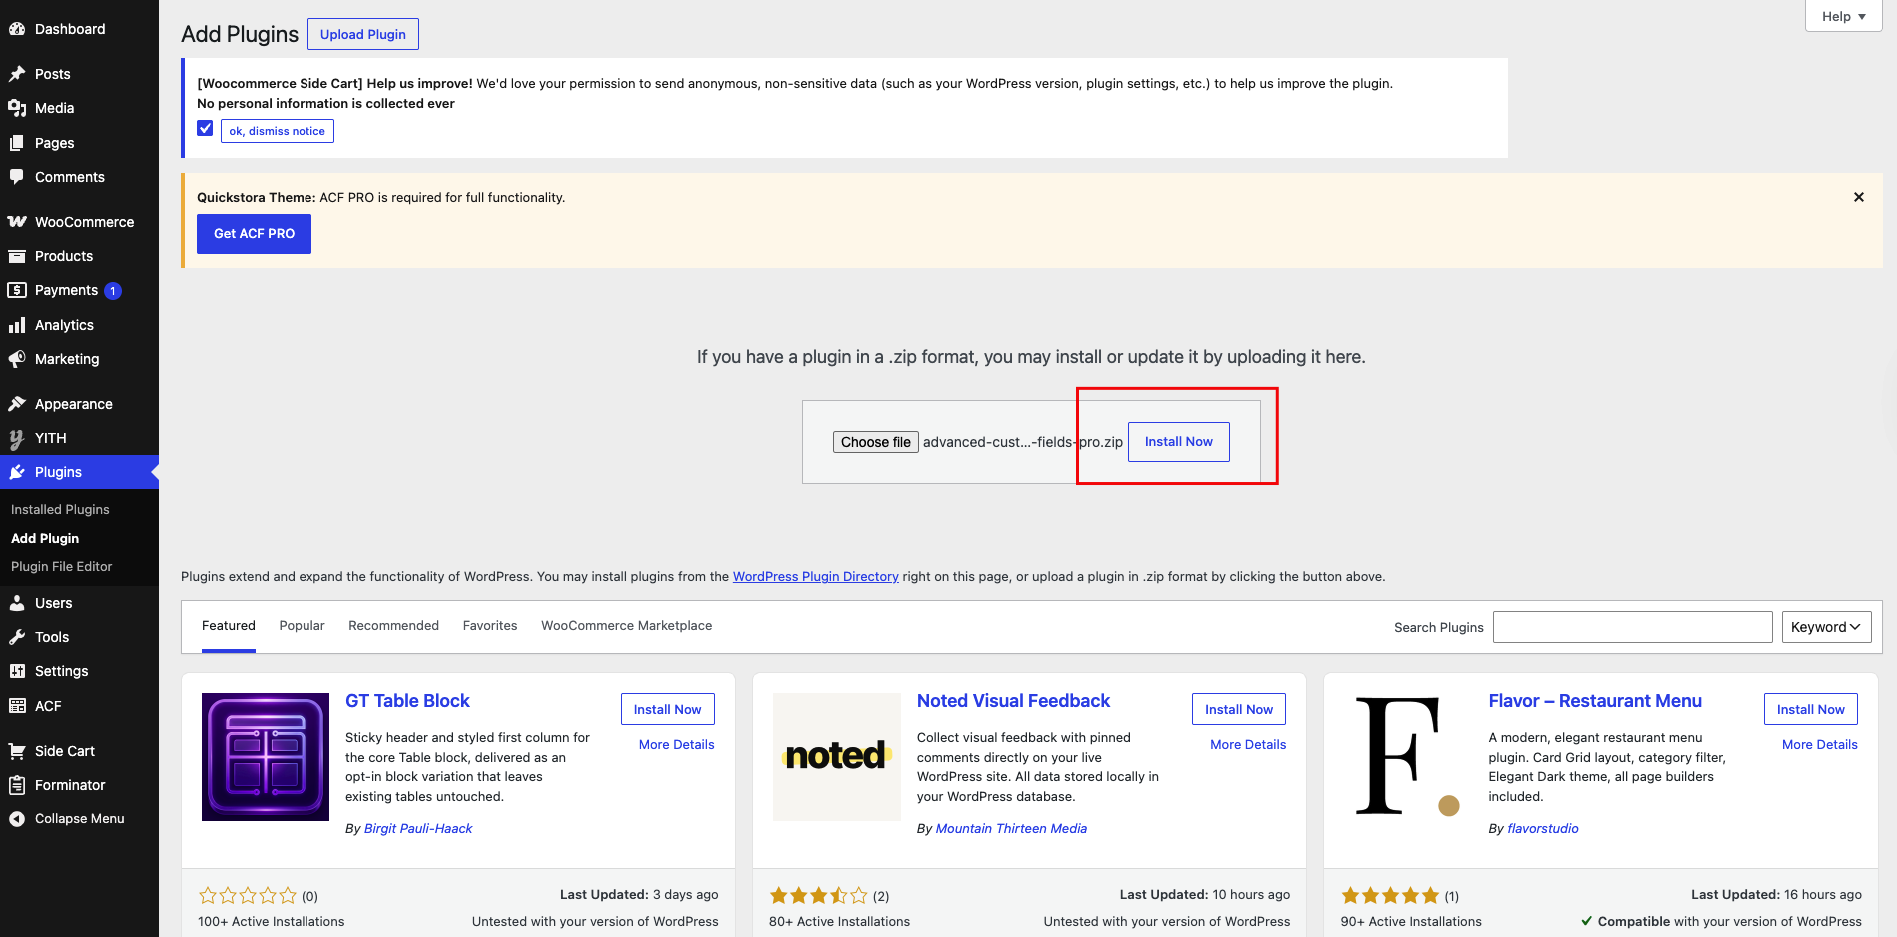
After installing all required plugins, you can import the demo content to make your website look like the demo preview.
Go to your WordPress dashboard and navigate to:
Appearance → Import Demo Data
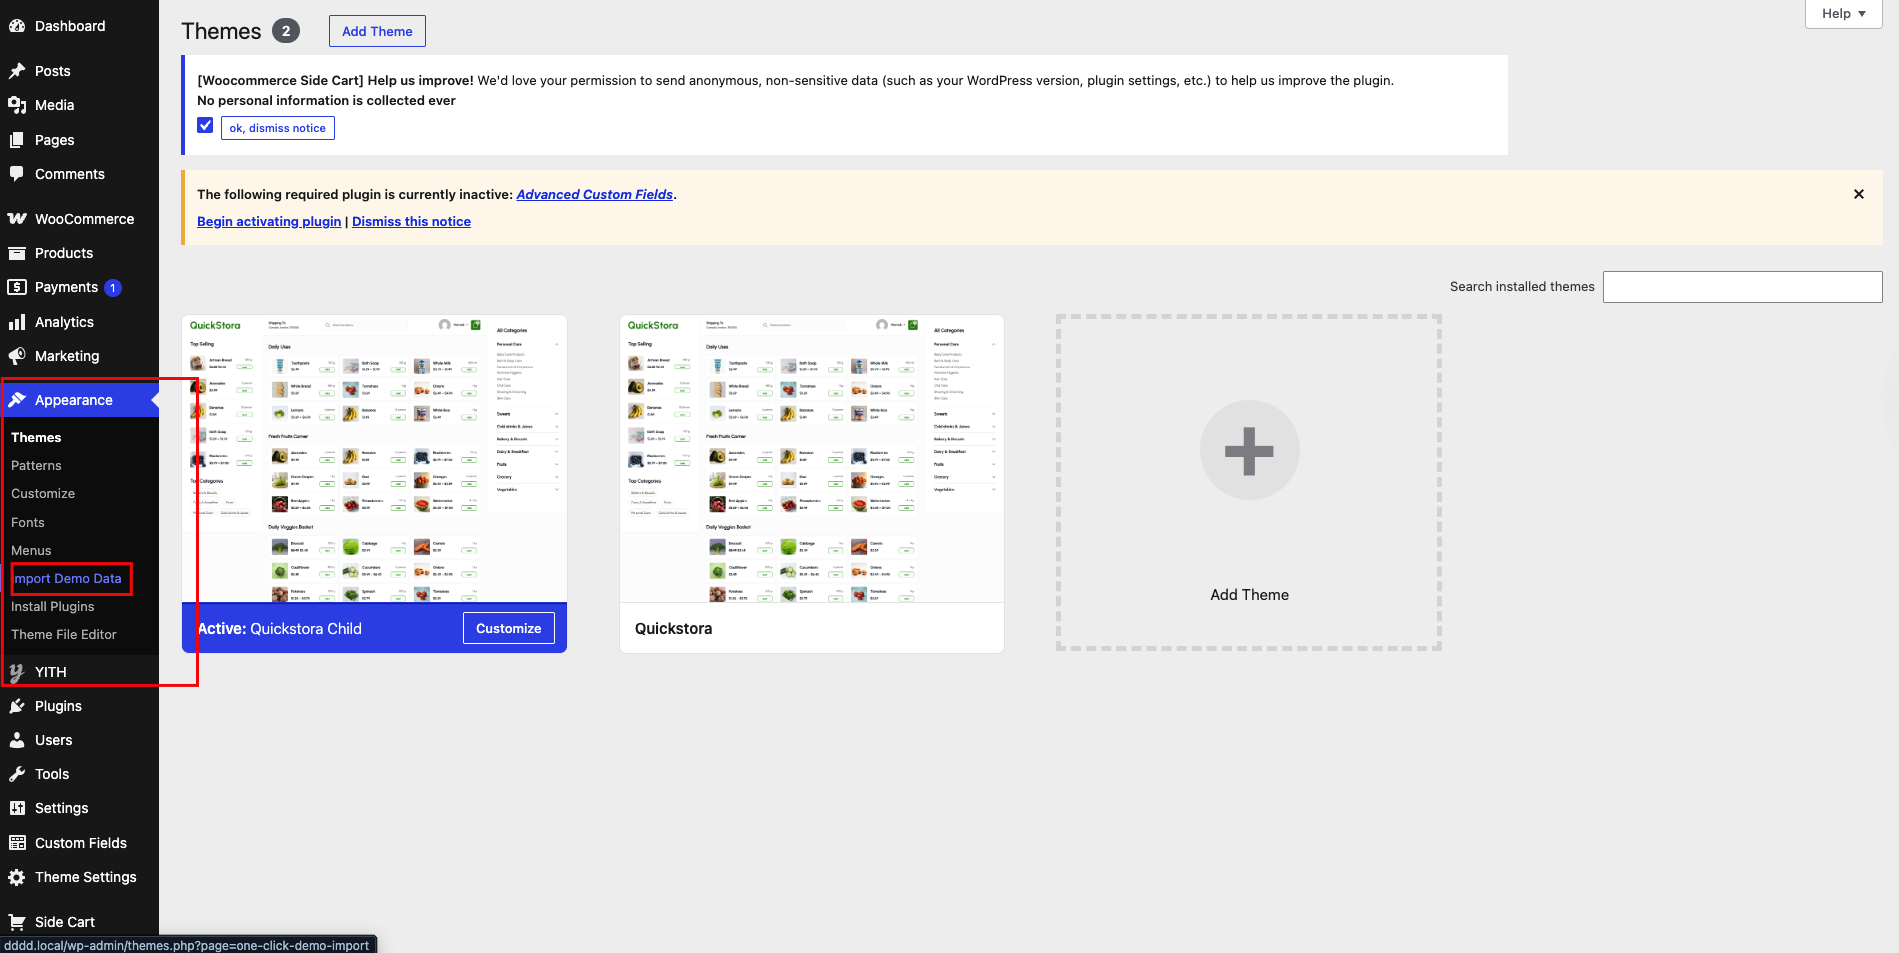
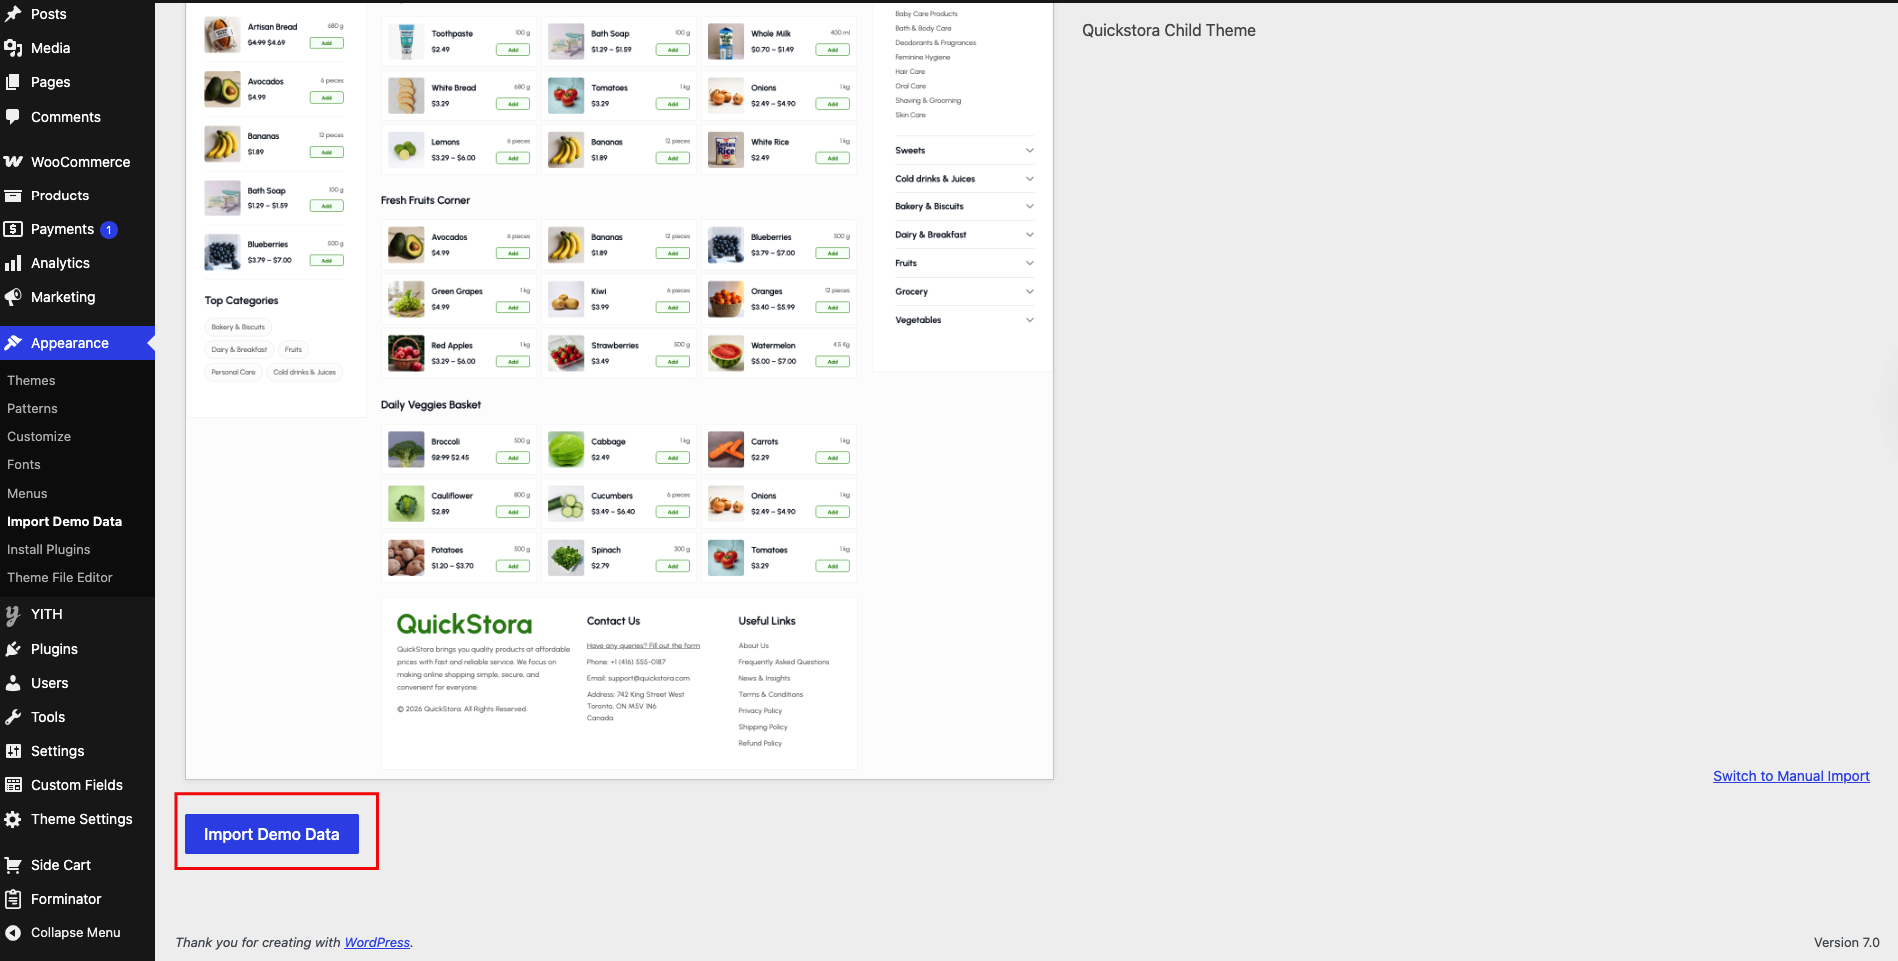
You will see available demo options.
Click on the “Import Demo Data” button.
Then click on the “Continue & Import” button, without selecting any options.
Wait for the import process to complete.
Once finished, your website will automatically be set up like the demo.
To get the same side cart design as the demo, you need to import the provided Side Cart settings.
Go to your WordPress Dashboard.
Side Cart (from sidebar menu)
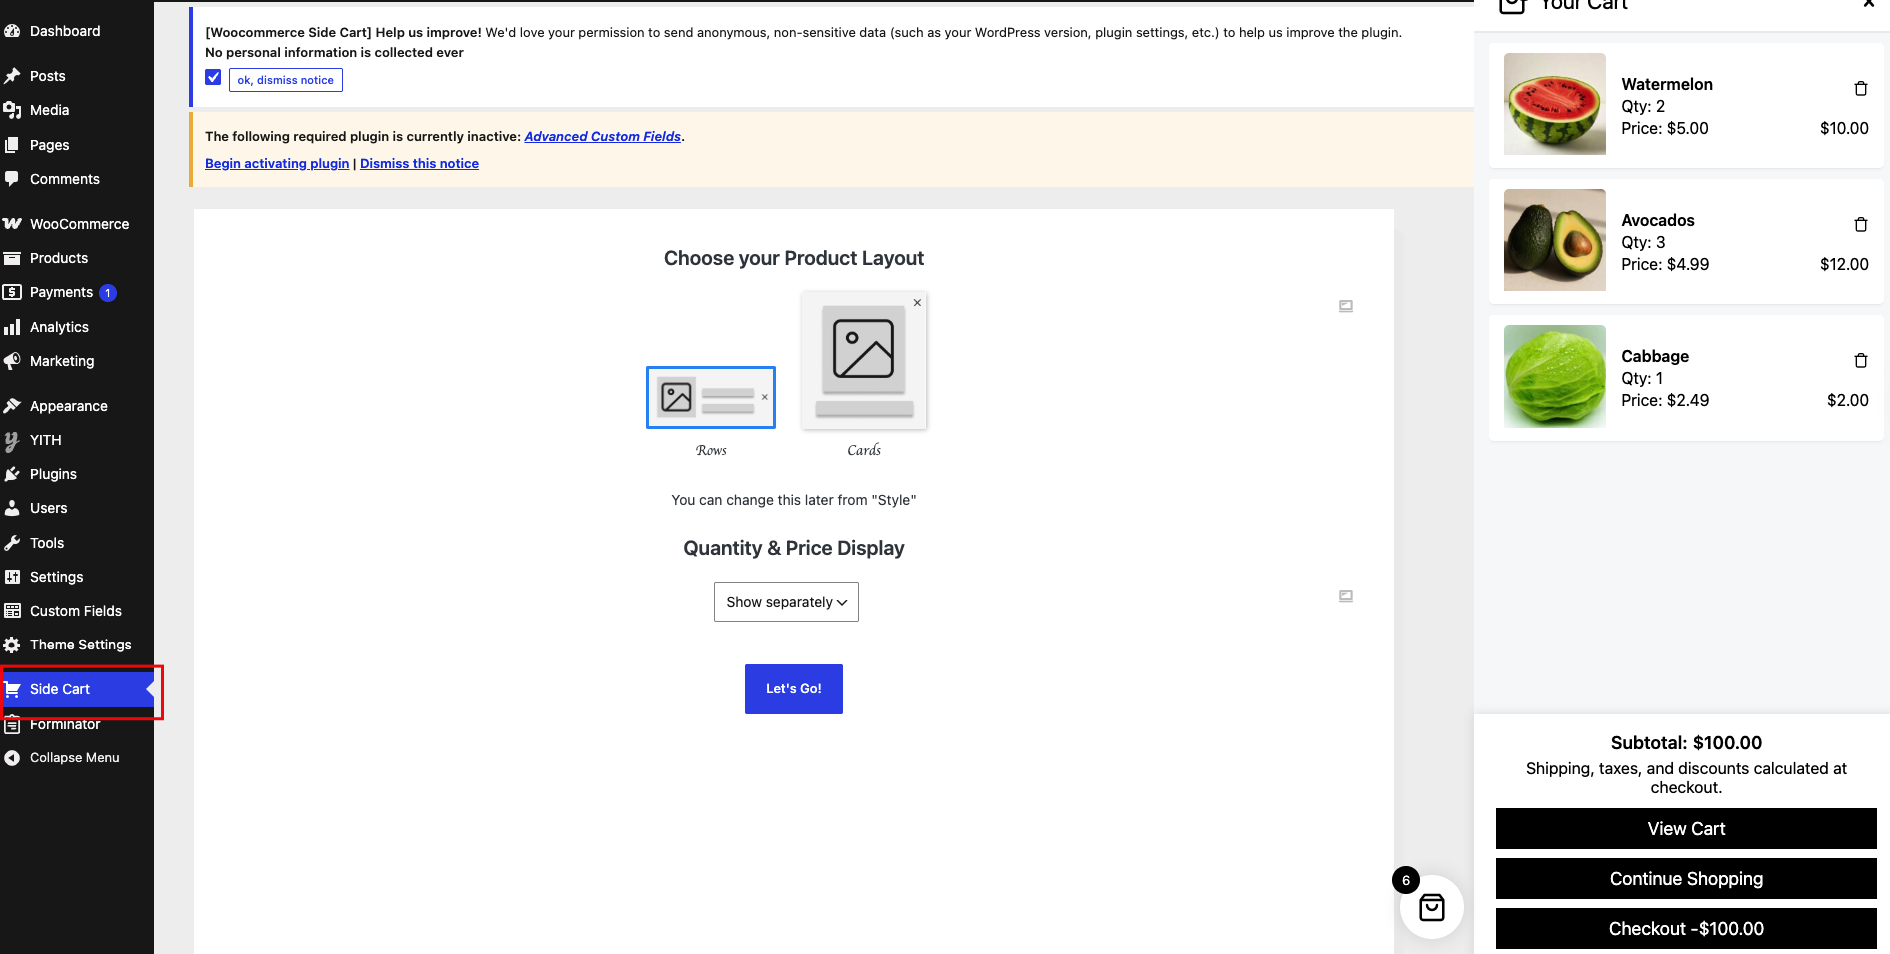
Click on the Four-way arrow icon
Click on Import Settings
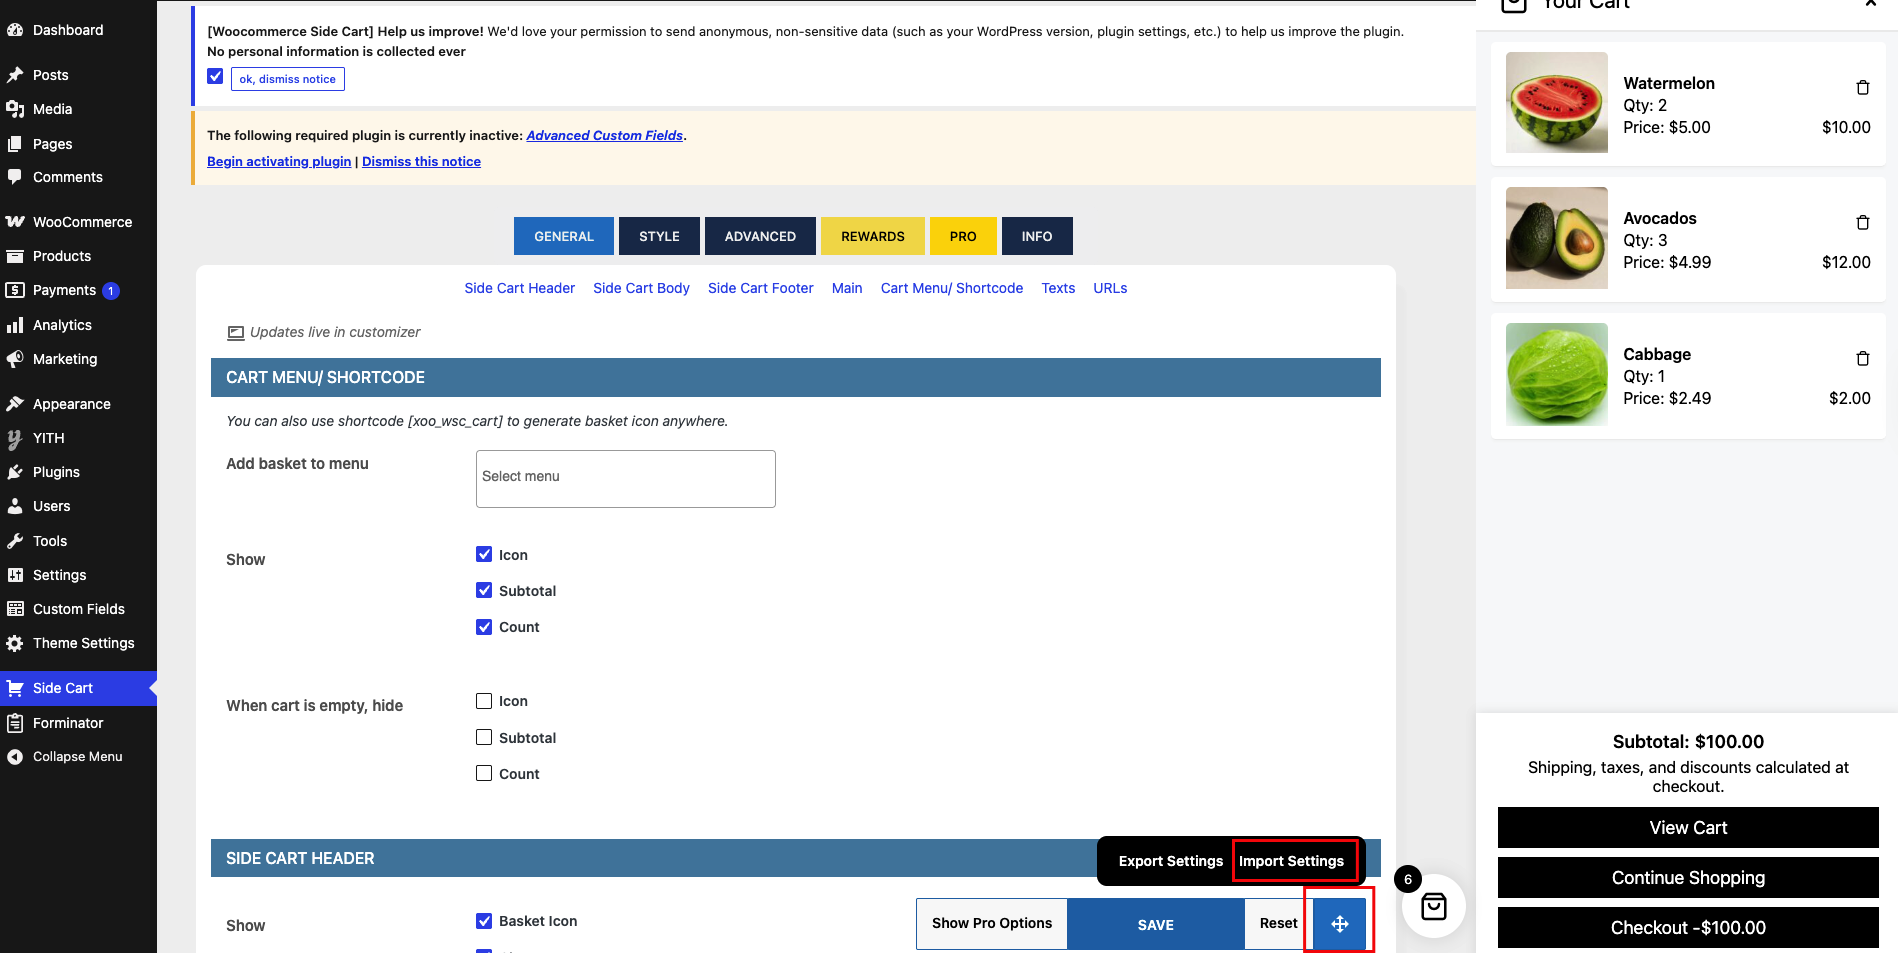
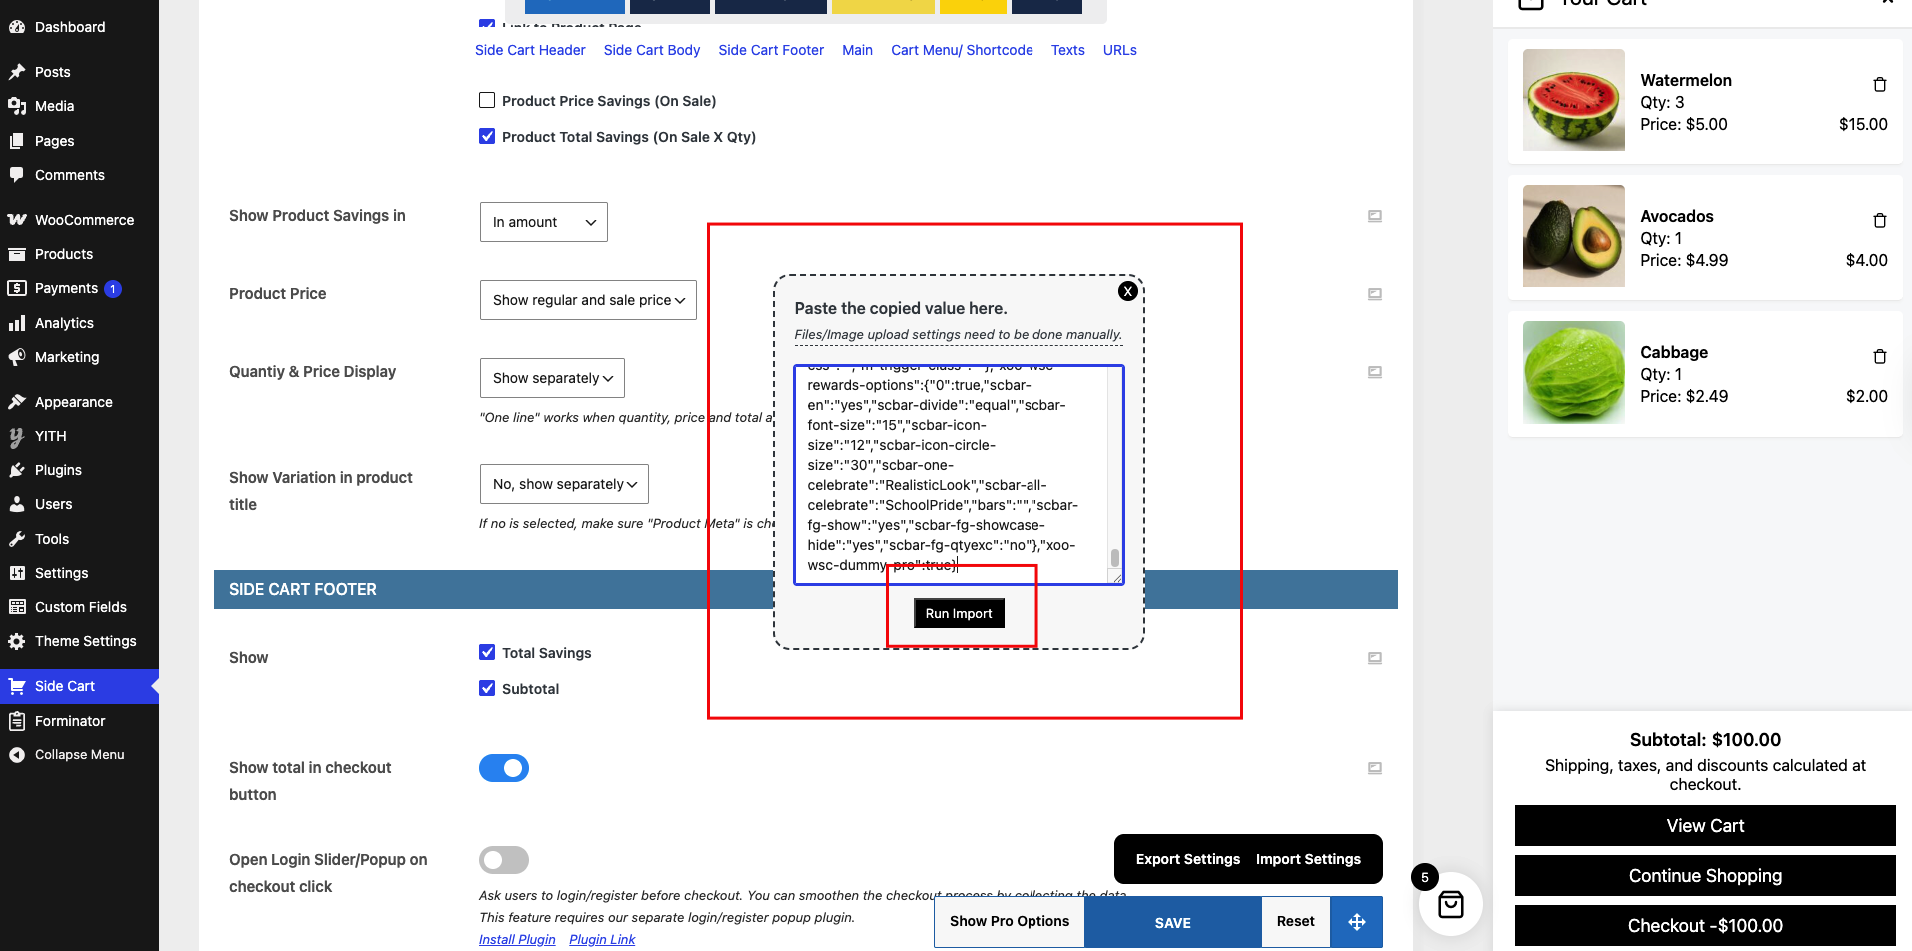
Paste the shared/import code provided with the theme.
After downloading the file, copy the JSON and Paste in the Popup and click on “Run Import”.
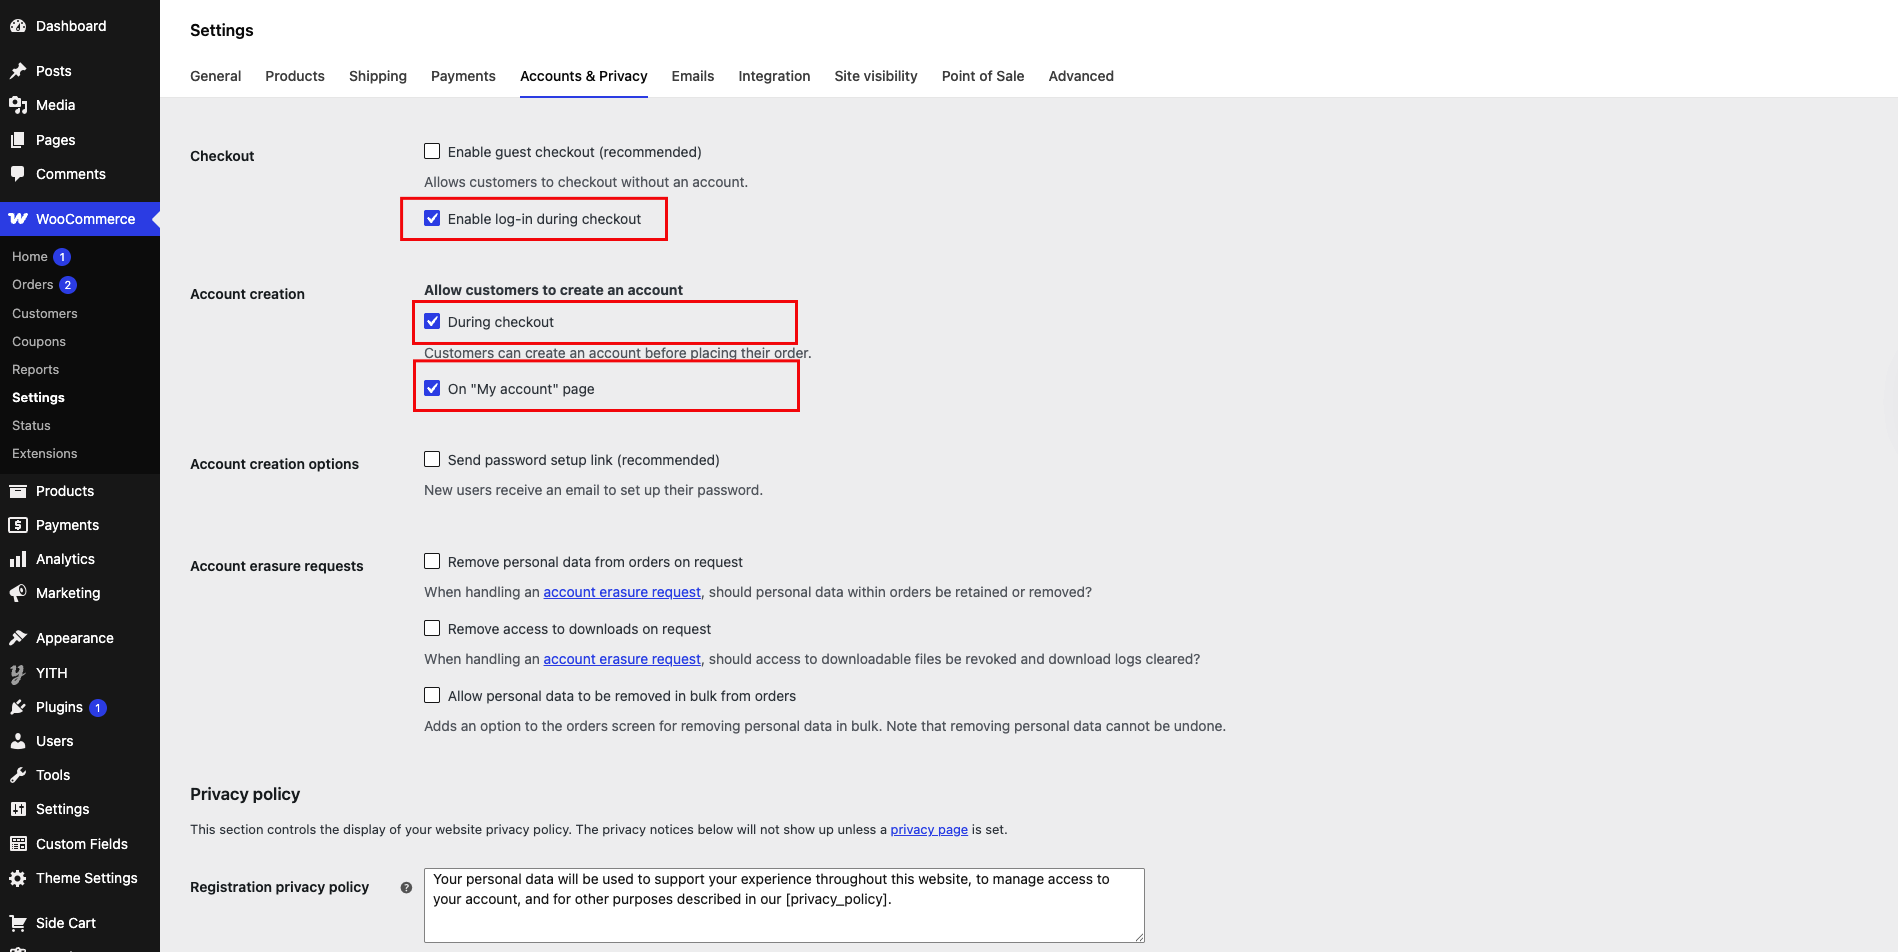
Navigate to:
WooCommerce → Settings
Click on “Accounts & Privacy”
Make sure to check these important boxes:
✔ Enable log-in during checkout
✔ During checkout
Customers can create an account before placing their order.
Appearance → Customize
Inside the Customizer, click on:
Site Identity
You will see the following options:
- Logo
- Site Icon (Favicon)
- Brand Short Description
- Copyright Text
Publish Changes
Click Publish
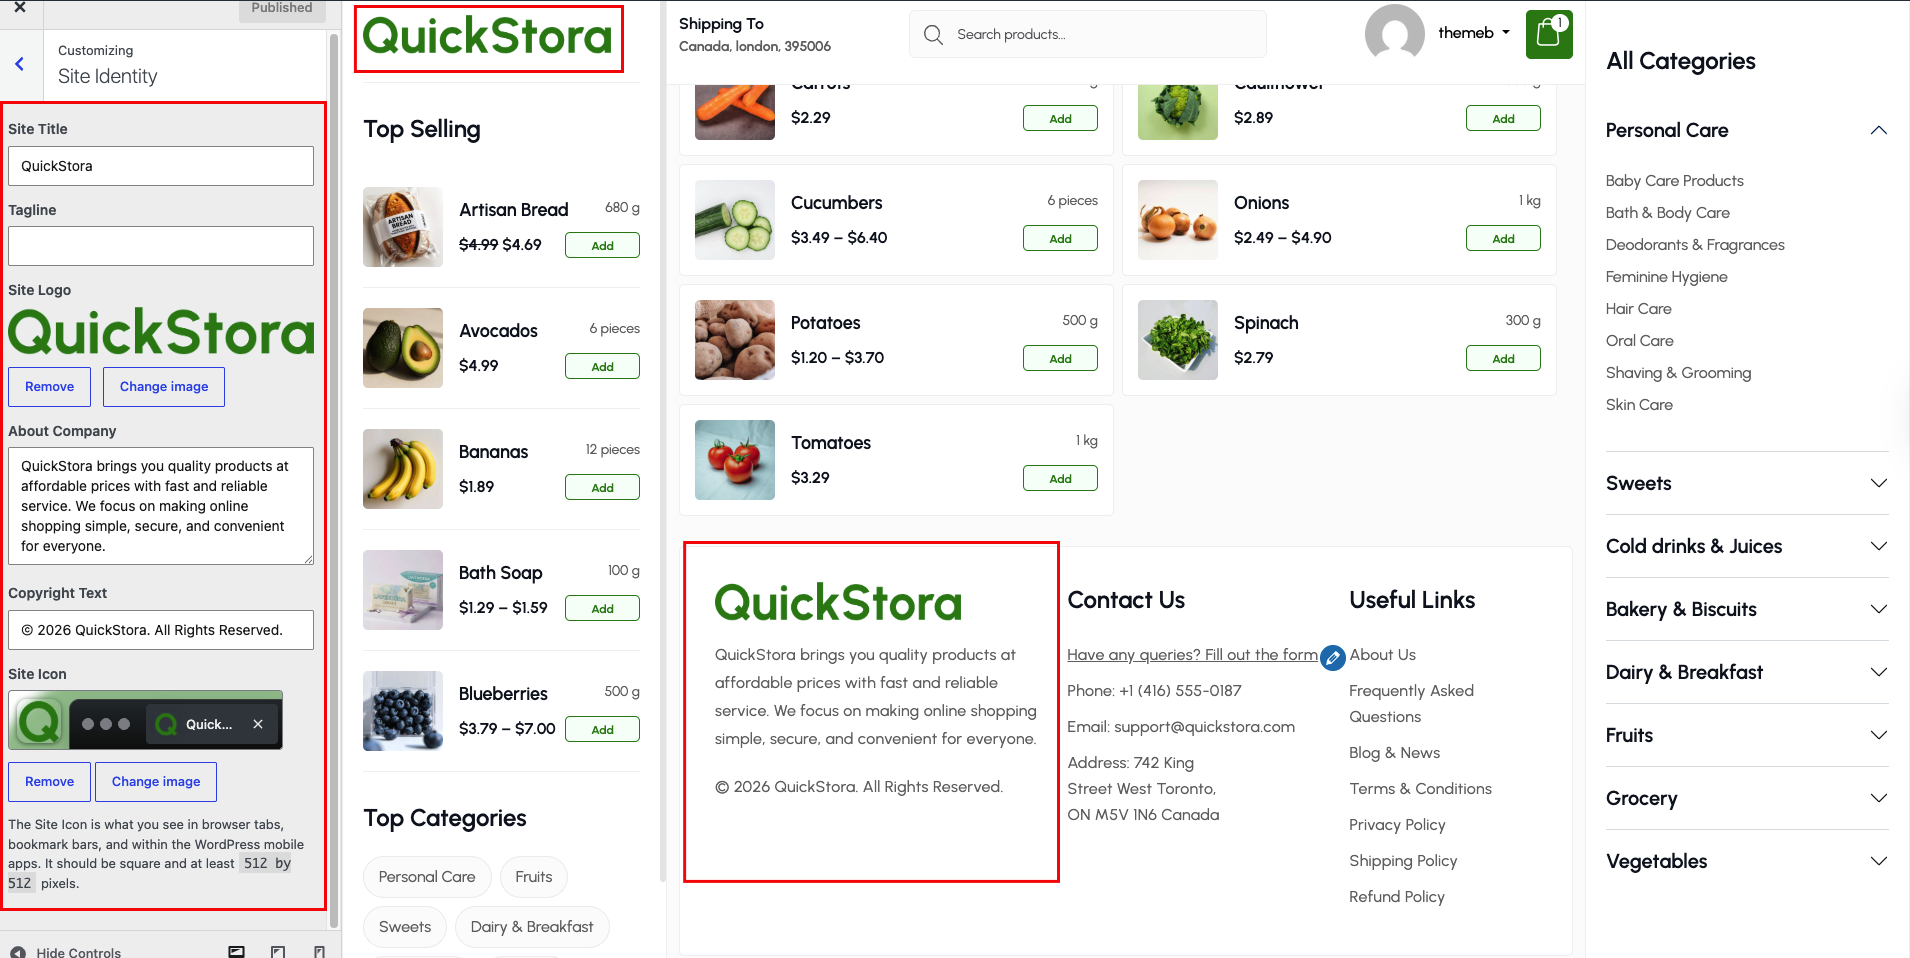
Appearance → Customize
Inside the Customizer, click on:
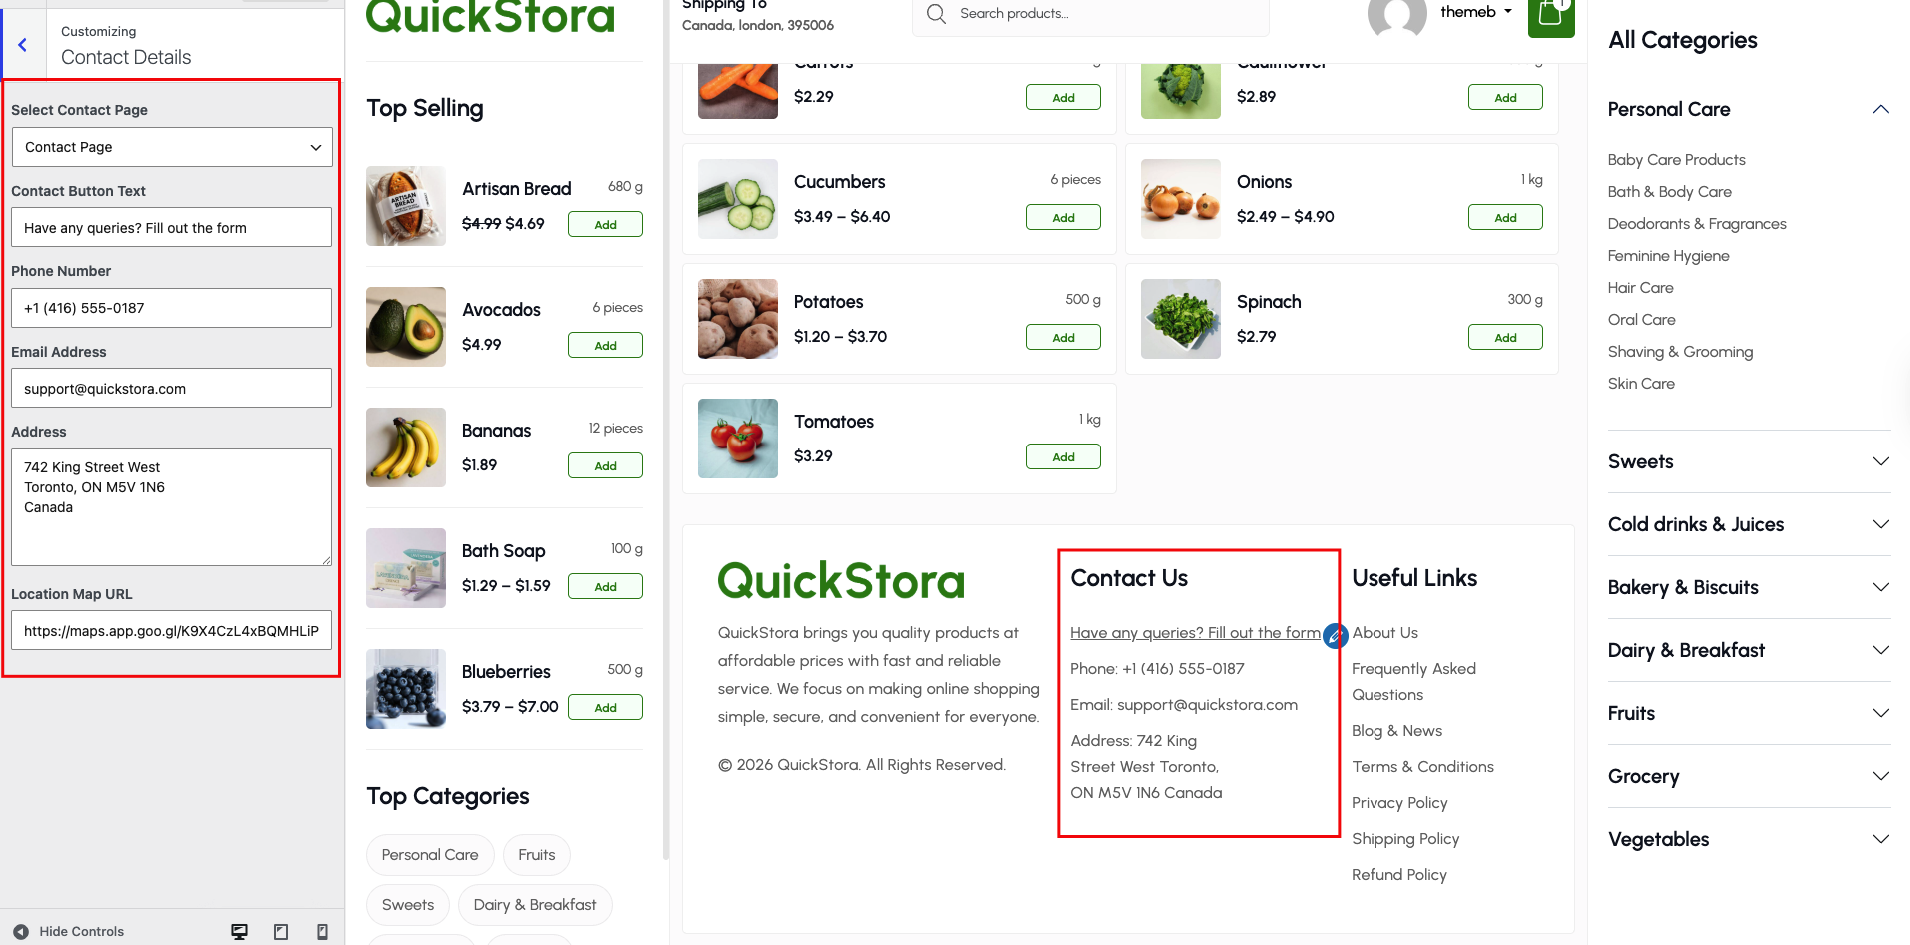
Contact Details
You will see the following options:
- Select Contact Page
- Contact Page Text
- Phone Number
- Email Address
- Address
- Google Map Link
Publish Changes
Click Publish